The following article explains how to use the physical diagrams in DataGalaxy.
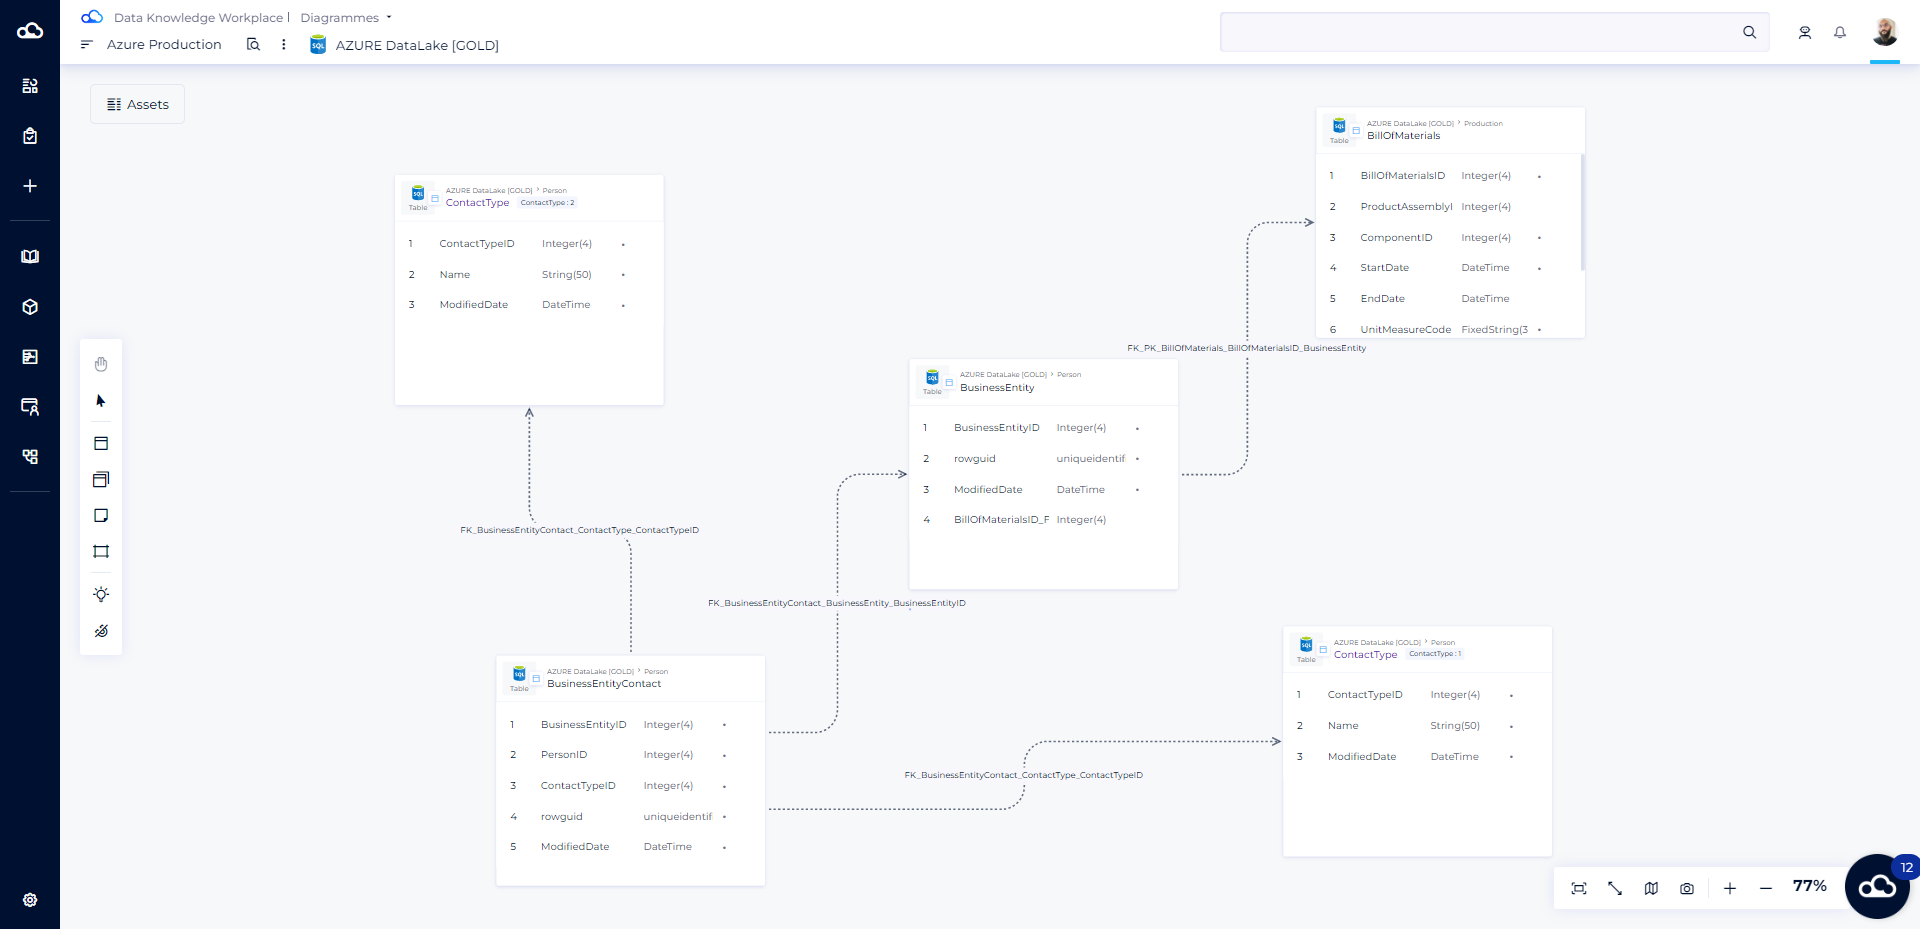
The main role of physical diagrams is to graphically represent a data model :
- Tables and columns are displayed in "boxes"
- Foreign keys and links are represented by arrows between these boxes.
Unlike the dictionary, the diagrams may only represent a partial representation of the model.
Diagrams are exclusively designed for relational databases.
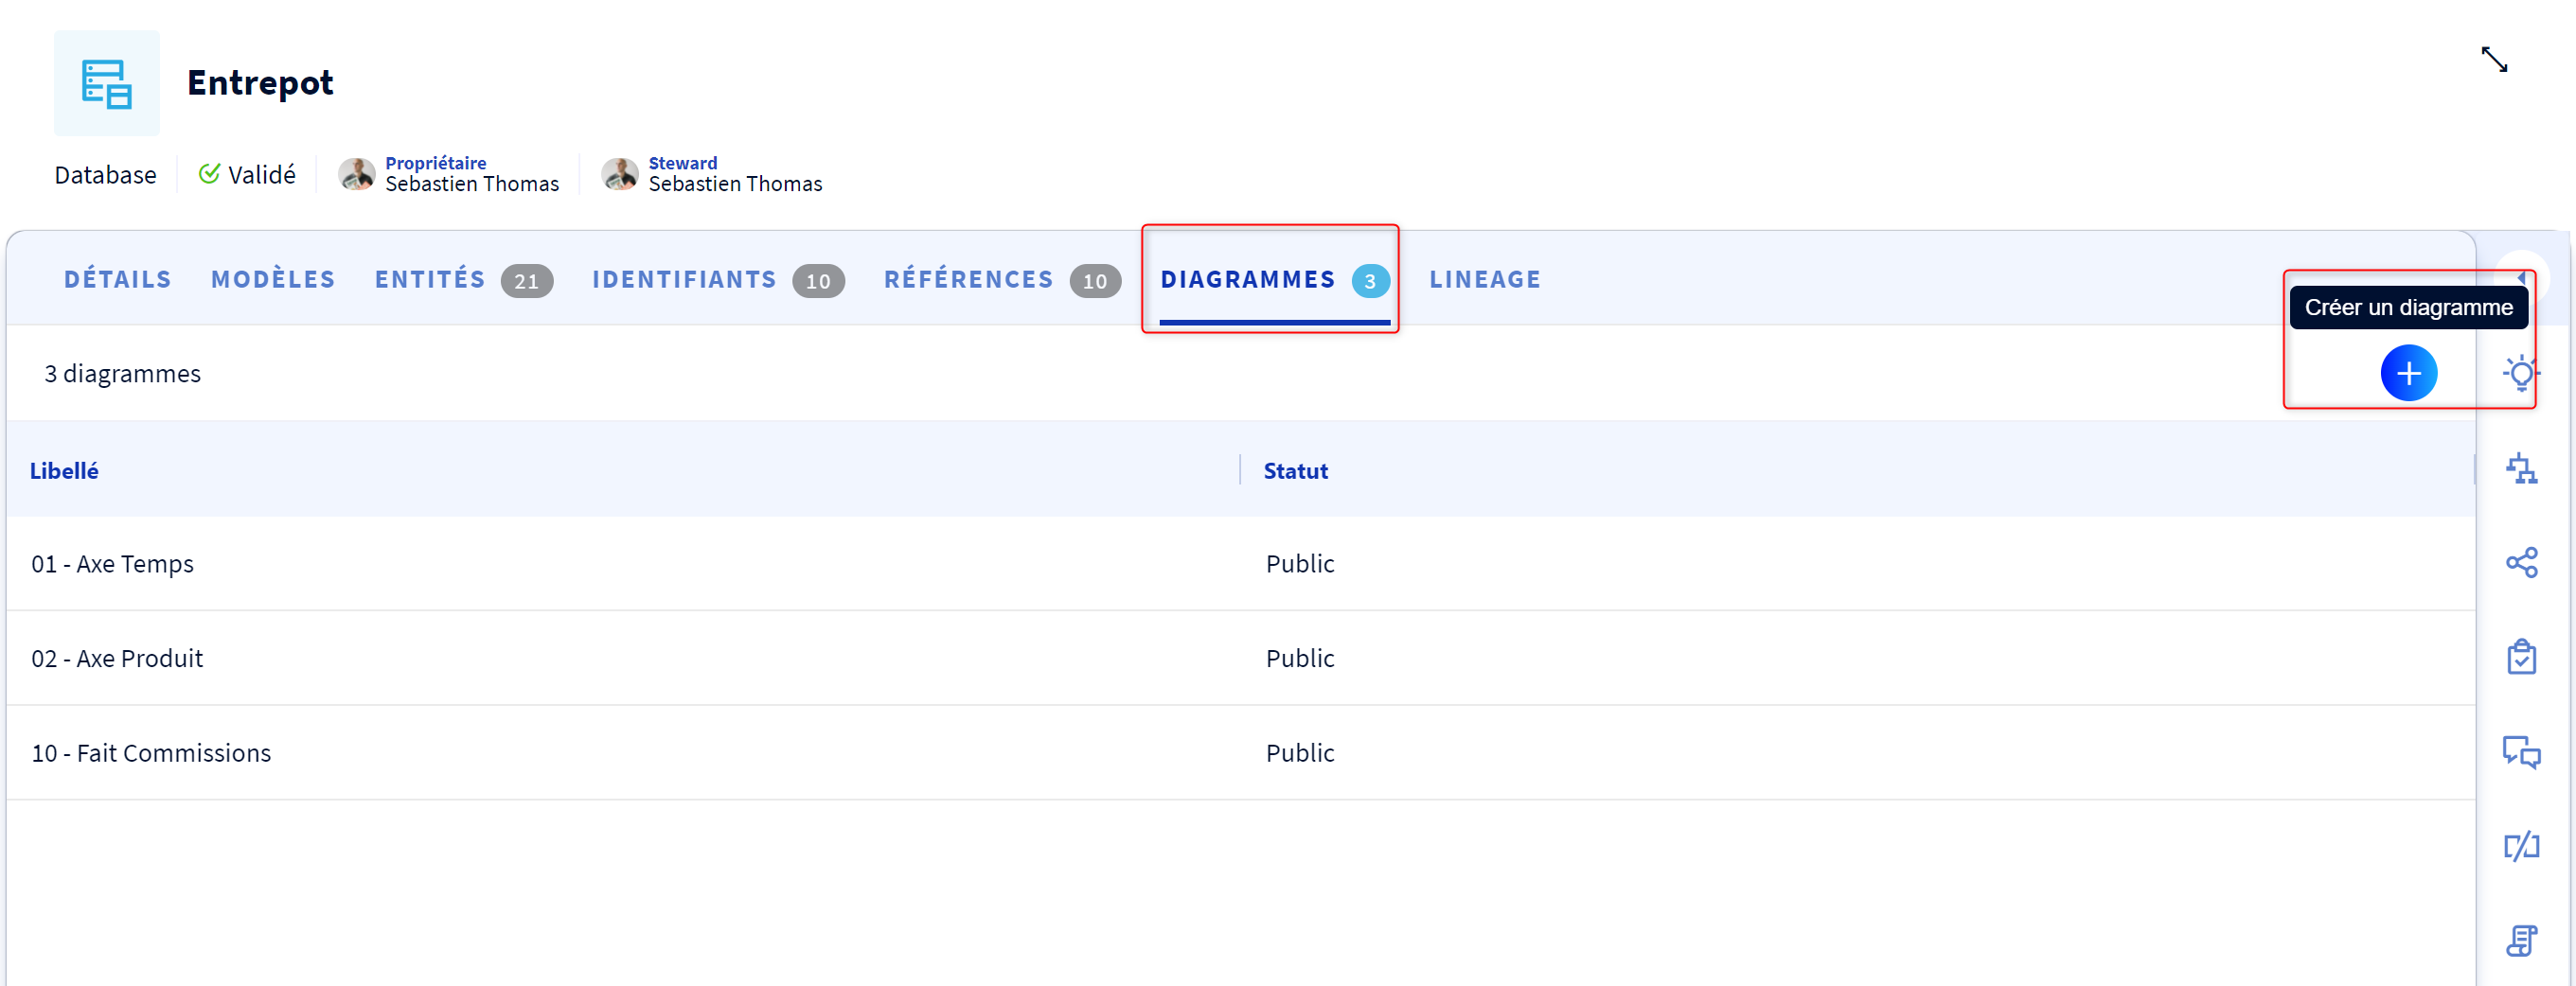
Create a diagram
To create your diagram, all you have to do is go to the diagram tab of your database and click on the "+" button.
Your diagram will then appear empty by default.
The diagram page is constituted of a main area in which you can drag and drop :
- Tables: A table is a technical object in a relational database that groups columns. A table is the technical equivalent of an entity.
- Primary keys: The primary key of a table is a restriction on one or more columns that guarantees the unicity of a row.
- Foreign keys: A foreign key is a referencing link between a table with a primary key (called parent table) and another table (called child table), or the same table (self-referencing). Foreign keys only exist in relational models. A foreign key is obligatorily combined with a functional link.
- Links: three types of links exists :
- Mandatory technical: grey and full line
- Non-mandatory technical: grey dashed line
- Functional: marked in green with a full line they allow to link two tables or views and so to identify that there is no link with integrity constraints between these two tables or a link between the two tables
- Notes that provide additional information.
Add a table to a diagram
If you have already imported / created objects in your database, you can use them to fill your diagram. To do so, all you have to do is :
- In the catalog asset list on the left, click on the entity or reference of your choice.
- Drag it to the stage area in the center of the screen.
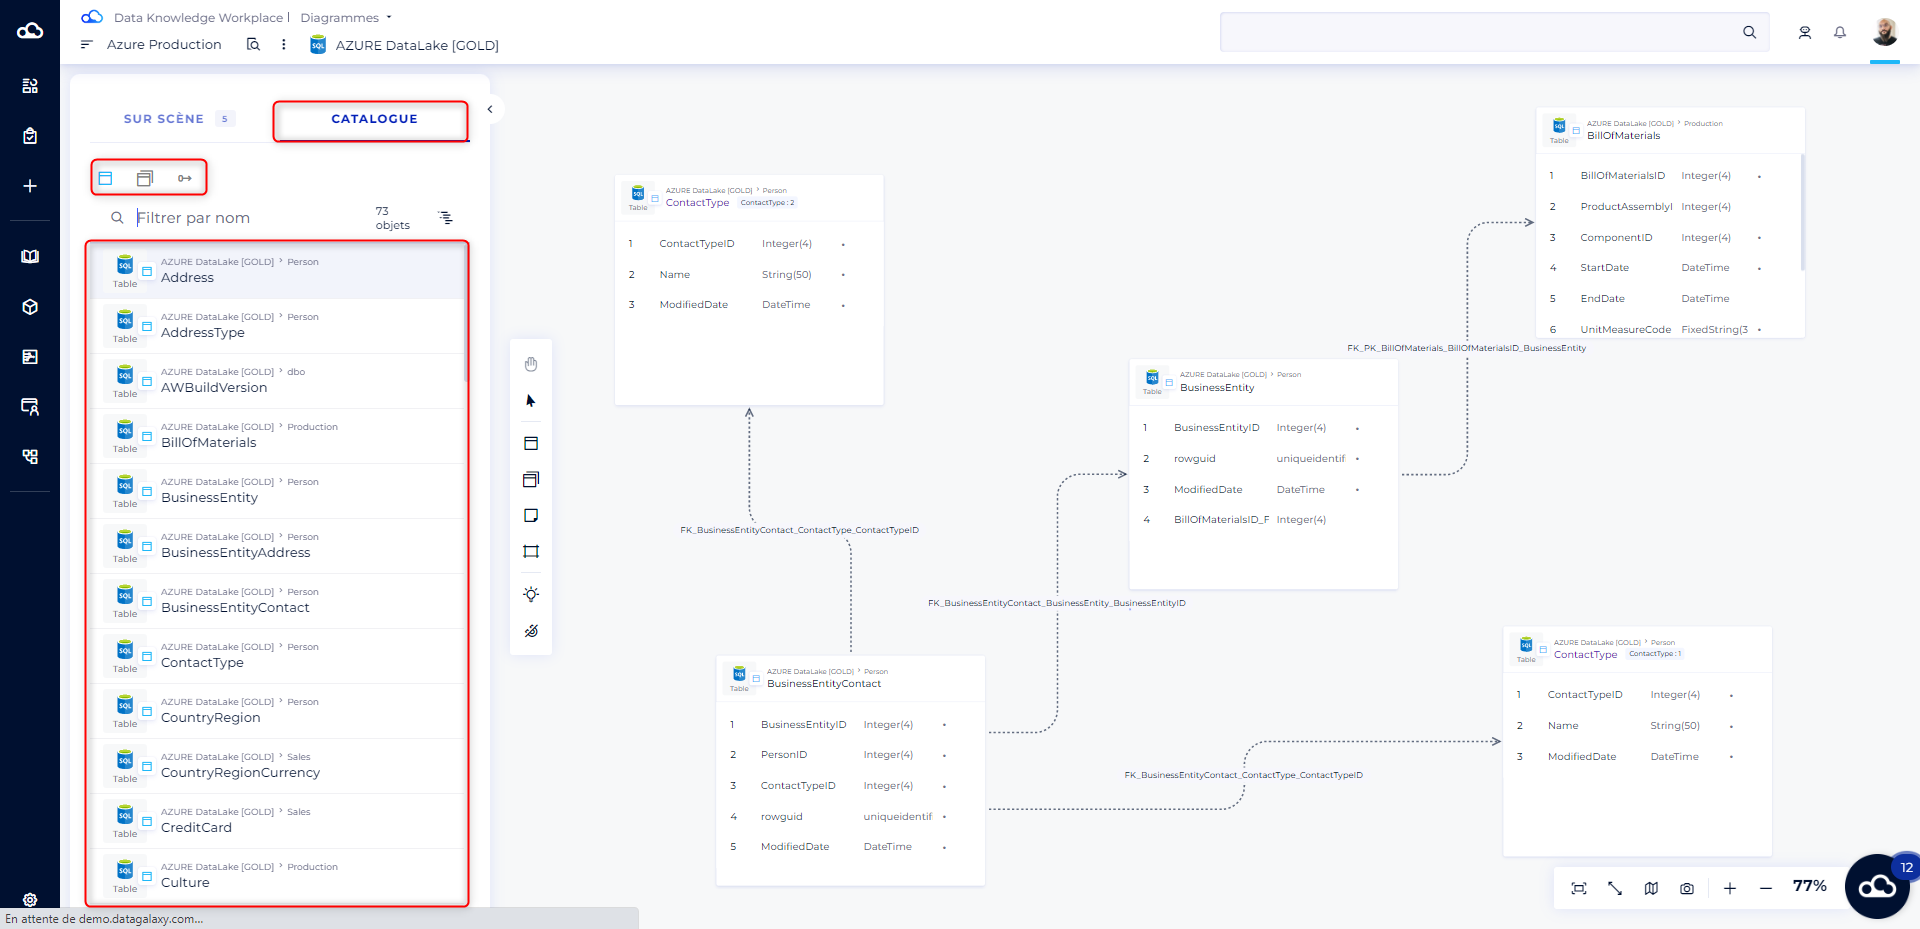
Note: the search algorithm of the catalog asset is a bit different from the algorithm of the main search therefore it can return different results.
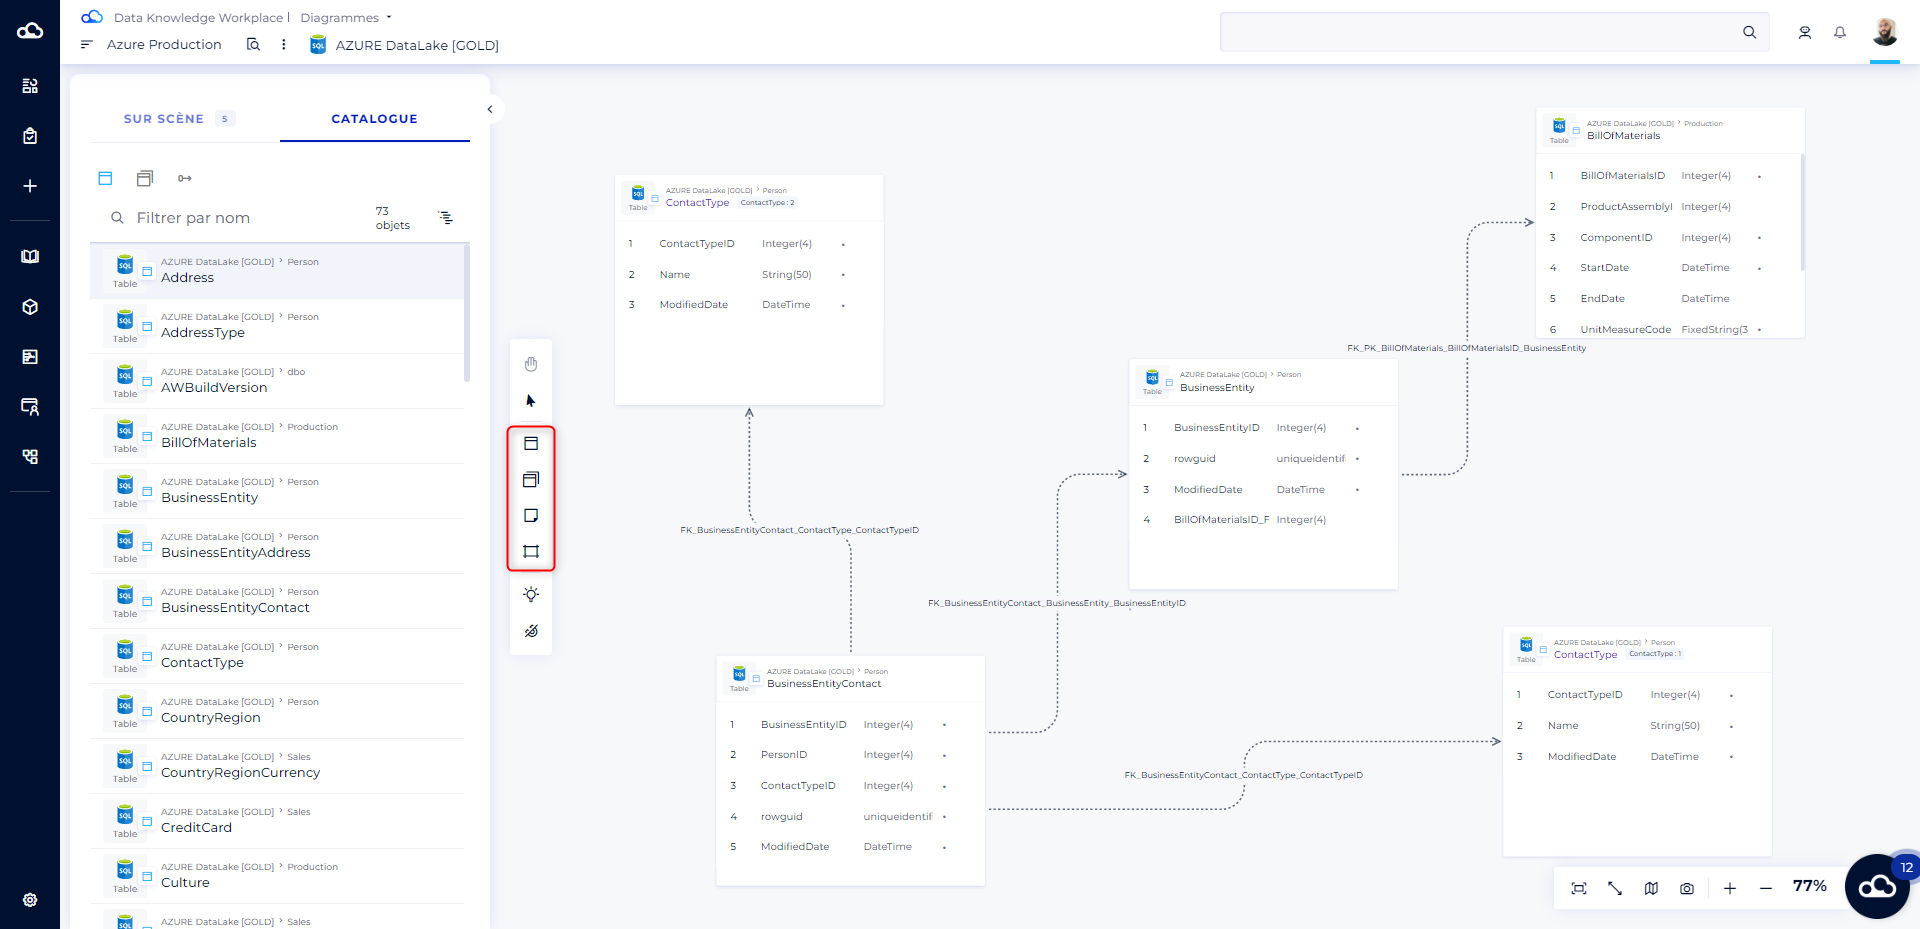
If you have not already created entities or would like to create new ones, click on the graphical toolbar on the left.
Create a column from a diagram
You can create a column right from the diagram. To do this, from your diagram :
- Drag a table into the stage area or click on the table icon to create a new table.
- After inserting the table on the table then on the option Manage columns from the burger menu
- Click on the "+" icon to add a column.
- The column is shown in the list.
 Manage primary keys
The creation of PKs is set from the primary key side panel of the choosen table.
- Technical label is for set up the label of the primary key
- Add column to the primary key is for searching columns from which the primary key is build
- Once selected, the column is displayed in the columns' list of the primary key.

Manage links :
In the physical diagrams it is possible to manage 3 types of links:
- Mandatory technical: gray and full lines
- Non-mandatory Technical: grey dashed line
- Functional: indicated in green with full line
To create a link, all you have to do is click on the foot of the initial table and drag it to the target table.
- If you are in functional mode, the link created will be functional. It is still possible to convert this functional link into a technical one.
- If you are in technical mode you can create a non mandatory technical link, which you can of course convert into a mandatory link.
A pop-up dialog box allows you to confirm/correct the properties of the link :
- Name of the link that will be shown on the diagram
- Description
- Mandatory or not
- Related column in the target table
A foreign key link can only be created using an existing column if that column has the same data type as the referenced primary key.
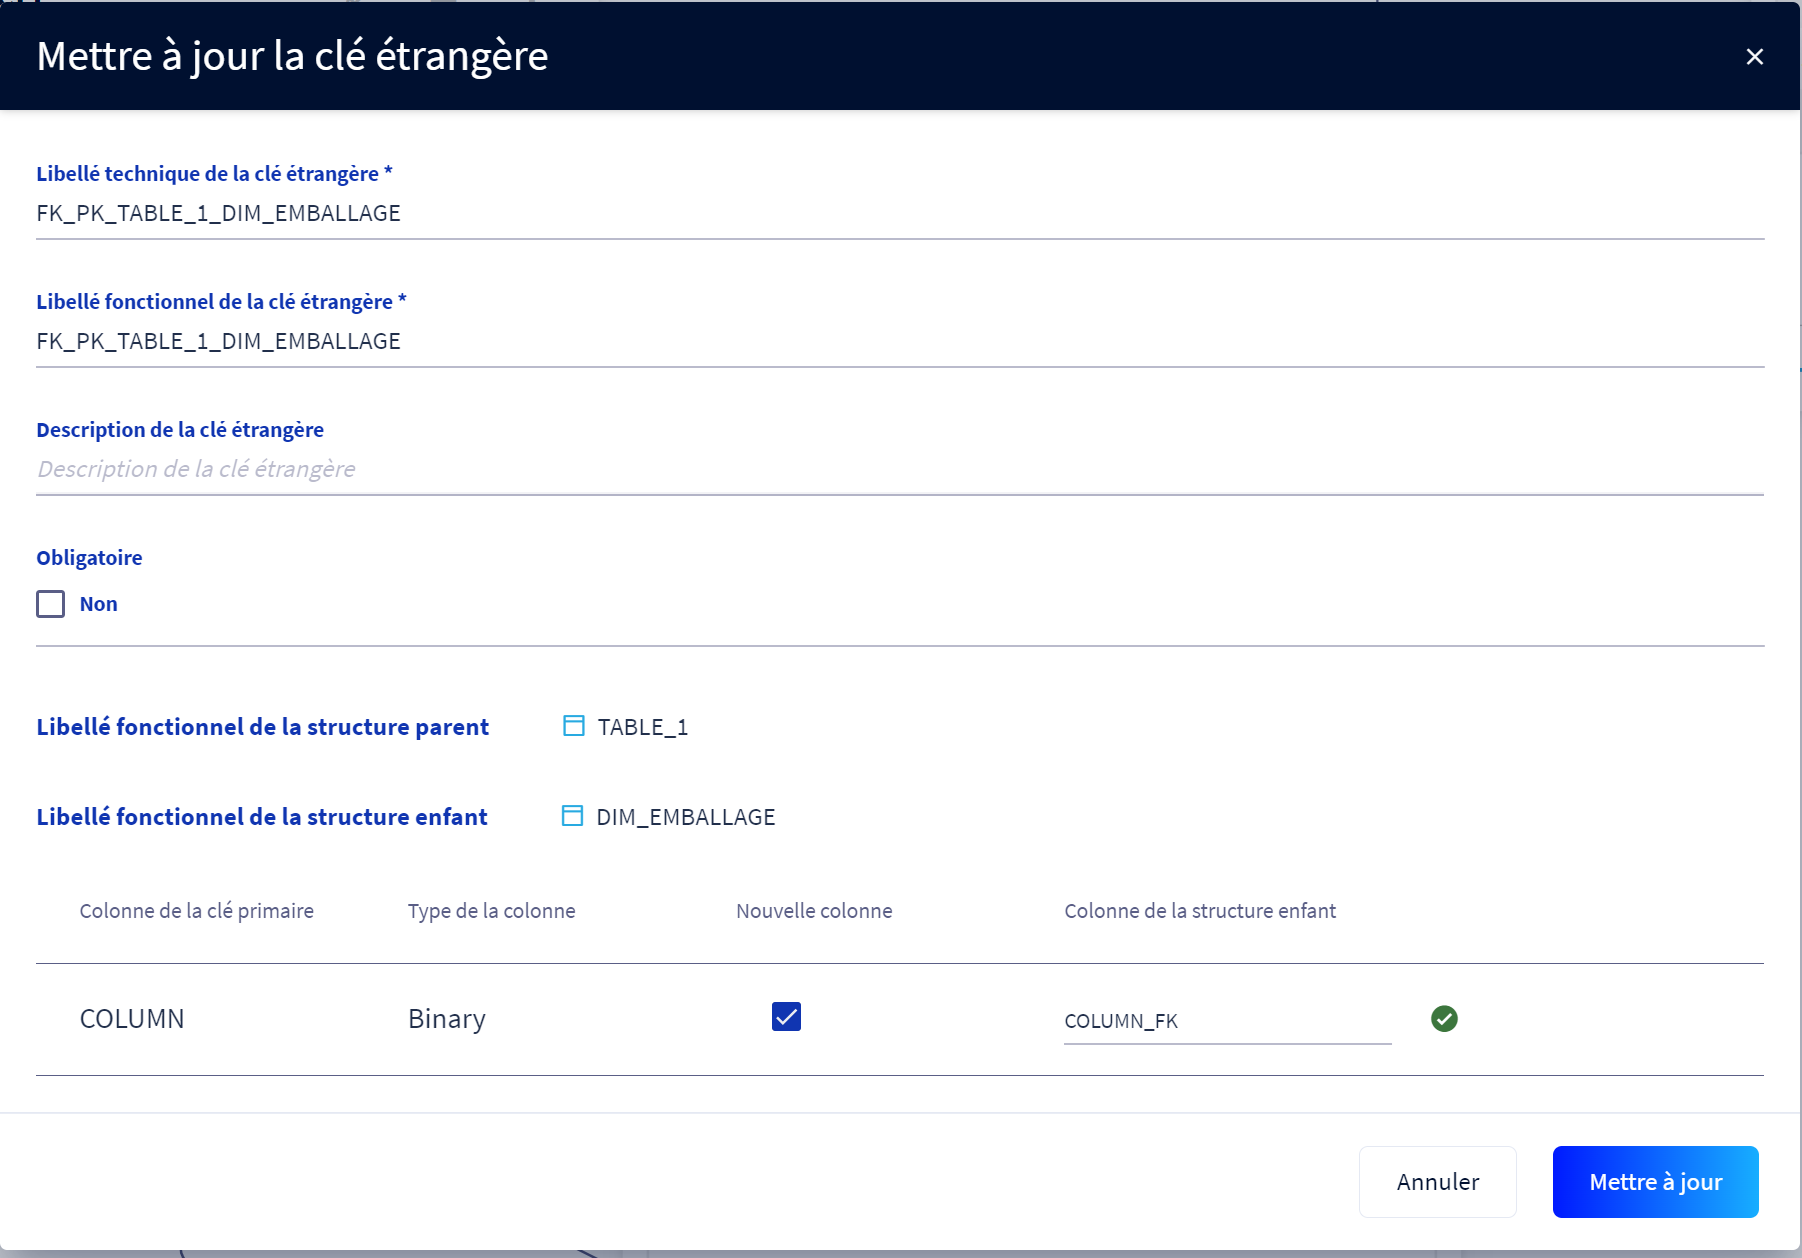
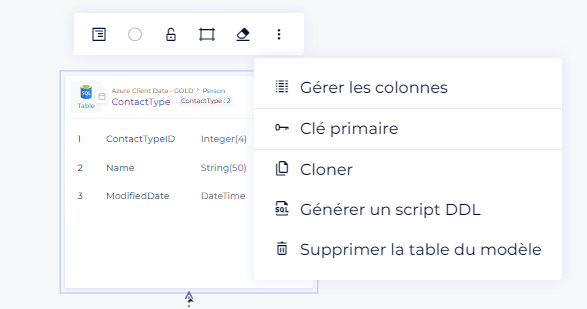
Table management tools
For each table, you can:
- From the action menu available after you click on the table:
- Change the display size of the boxes
- Select a color for the table
- Lock the position of the box for all user who have access to this dagram
- Create a frame around the table
- Remove the table from diagram (The table s not deleted from DataGalaxy, it is only removed from the diagram)
- By clicking on the burger menu (the three small dots) you can
- Access the table's columns
- Access the table's primary key
- Clone the table
- Delete the table from the model: be careful, this means permanently deleting the table from DataGalaxy.
Sharing the information
Diagrams can be
- Private: visible only by their creator.
- Public: available for workspace users. Only the source administrators can publish a diagram.
New diagrams are by default private diagrams.
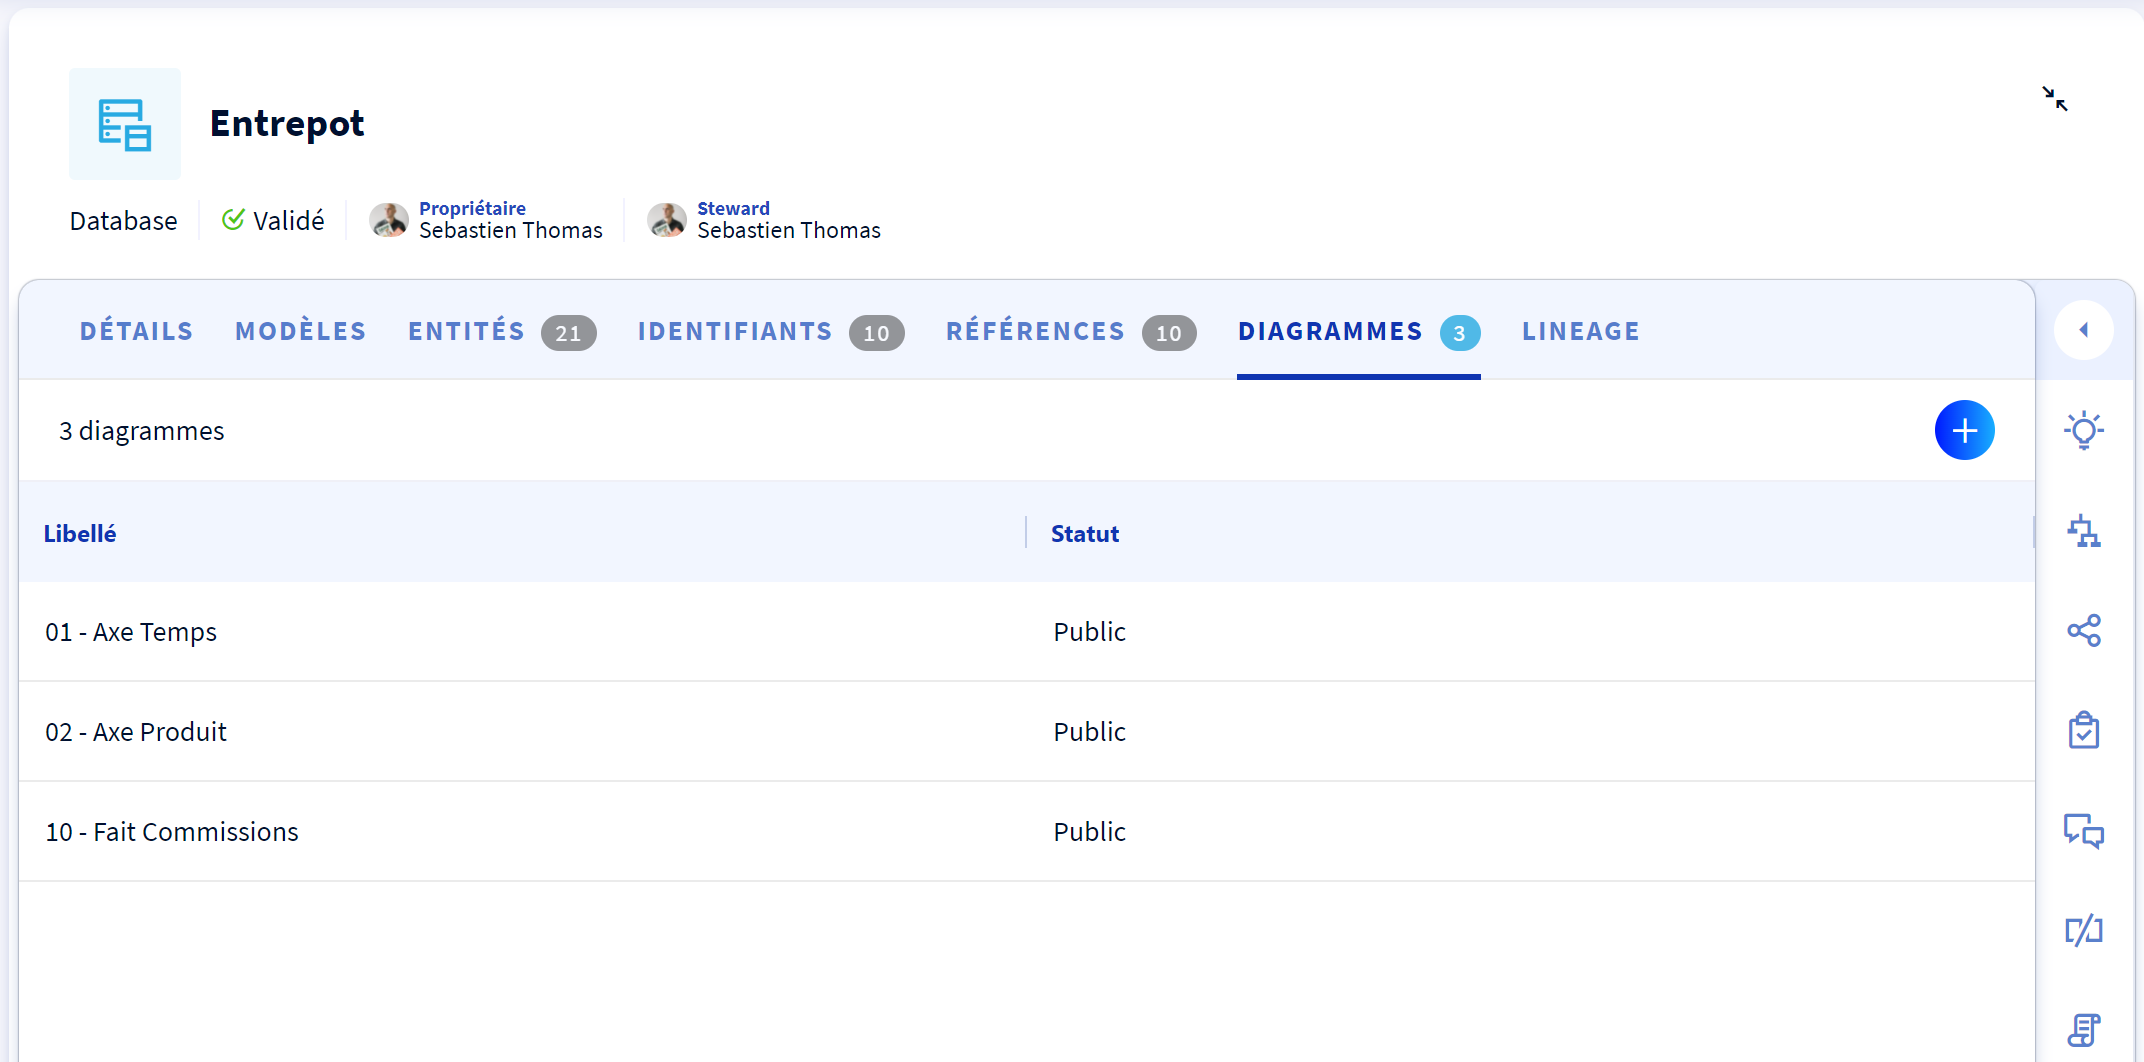
To publish a diagram, click on the following button.
Warning : Once a diagram has been set to public mode, it is no longer possible to set it back to private mode.
 Tips
Tips
These different buttons allow you to optimize the display of your diagram
