This article concerns a feature that is currently in beta mode. We would like to inform you that it may present known bugs and limitations. Please consult the list at the end of this article. DataGalaxy will make the feature available in final version to its clients (the "General Availability") with the corresponding subscription.
Introduction to Campaigns
In this article, we’ll detail how to use The Data Knowledge Catalog’s new Campaigns module - We will take you through every stage, from initial campaign creation to its final completion, so that you can fully understand how to take advantage of this module to monitor your workflows and optimise your processes.
To find out more about the concept of campaigns and workflows, read the article: Introduction to Campaigns and Workflows.
The Campaigns module is an essential feature that allows you to precisely monitor the progress of defined and customized Workflows according to your needs, or of the default workflow suggested by DataGalaxy.
Using the Default Workflow
DataGalaxy offers “DataGalaxy Objects Lifecycle Workflow,” a default workflow based on status to manage objects from their creation to their validation, including revisions and validation checks. This simplifies data management by providing a clear structure for tracking and managing the progress of objects throughout their lifecycle. You can also customise this workflow to meet the specific needs of your organization, adapting it to your internal processes.
Note: The default workflow is directly displayed in the platform. Only its modification or deletion requires the use of DataGalaxy's private APIs.
This workflow includes four phases:
- Proposed: This phase marks the start of the object life cycle. All objects in this phase must be in Proposed status.
- Revision: Corrections, improvements, and adjustments can be made to objects to complete them and make them compliant with standards or requirements. All objects in this phase must be in Revision status.
- Validation: In-depth checks are required during this validation phase to ensure that the objects are in conformity. All objects in this phase must be in Validation status.
- Validated: This phase ensures that the objects have been validated and are ready to be used or put into practice. All objects in this phase must be in Validated status

Creating a Workflow
To create your own Workflow, you will need to use DataGalaxy's private APIs which are accessible via the back-end service. To get started, make sure you configure your environment in your API tool. You will find an example of a configured environment associated with this article, which you can use as a reference:
| baseUrl | http://<monenv>.datagalaxy.com: You must fill the baseUrl variable with the URL of the DataGalaxy environment you are using. Replace <monenv> with the URL specific to your environment. |
| userLogin | DataGalaxy username: You must provide the username of your DataGalaxy account in the userLogin variable. This will allow DataGalaxy to identify you when you use the APIs. |
| userPassword | DataGalaxy password: You must enter your DataGalaxy password in the userPassword variable. This ensures that you have the necessary authorisations to perform the desired actions. |
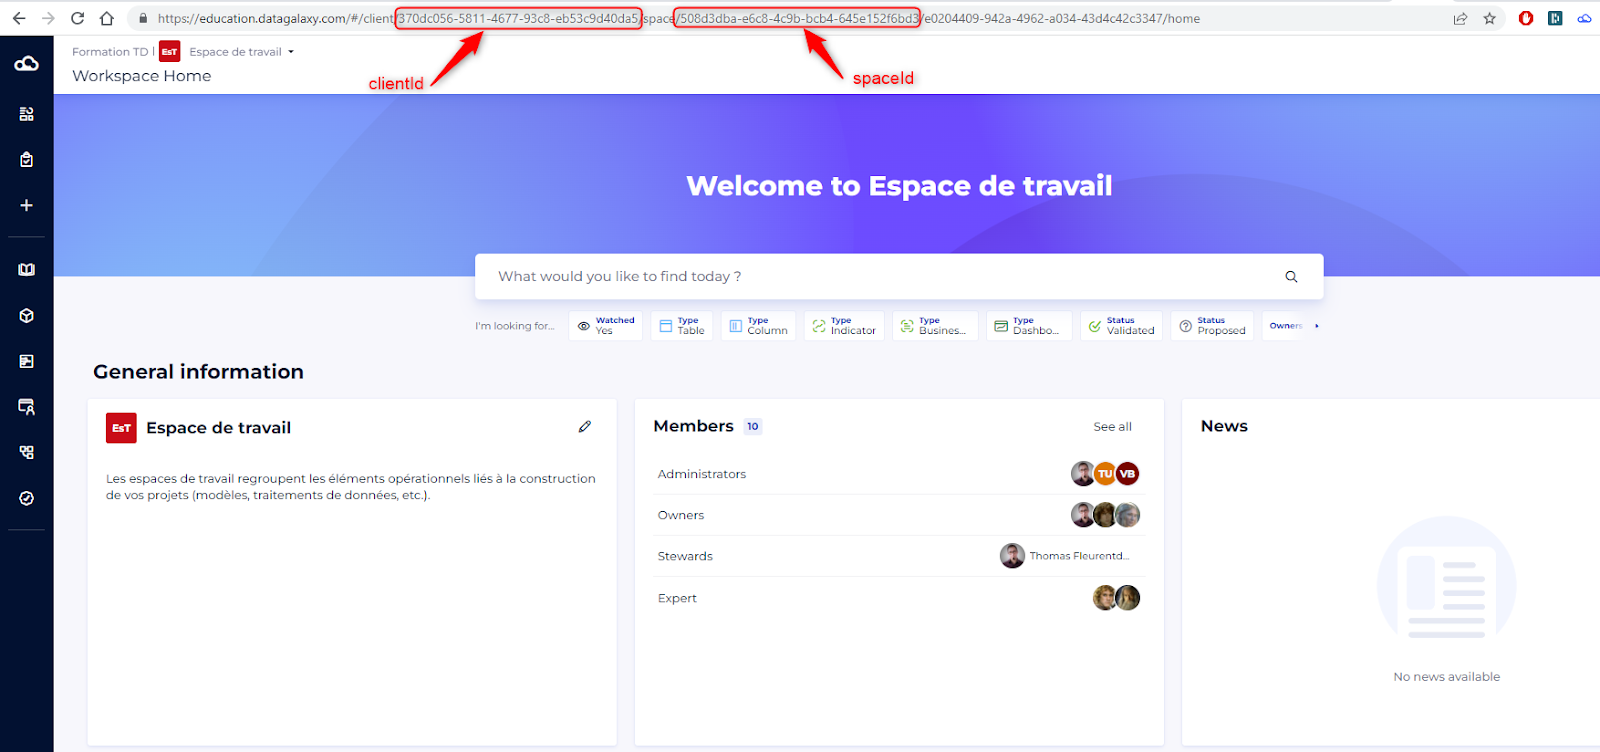
| clientId | Client Space GUID: This variable must contain the unique identifier of your client space. You can usually find it in the DataGalaxy URL when you are connected to the target environment. |
| spaceId | Workspace GUID: This variable must contain the unique identifier of your workspace. You can also find it in the DataGalaxy URL when you are connected to the target environment. |
To find your client id and space ID, please refer to this illustration:
Once you have set up your environment correctly, you can start creating your workflow. To help you do this, you will find attached two collections of examples for “Postman.” These collections contain the essential routes required to configure the example workflow mentioned in the article Introduction to Campaigns and Workflows.
These collections offer a solid starting point for understanding and implementing the actions required to create your workflows. They include pre-configured queries that will allow you to interact with DataGalaxy efficiently and to customize your workflows according to your specific needs.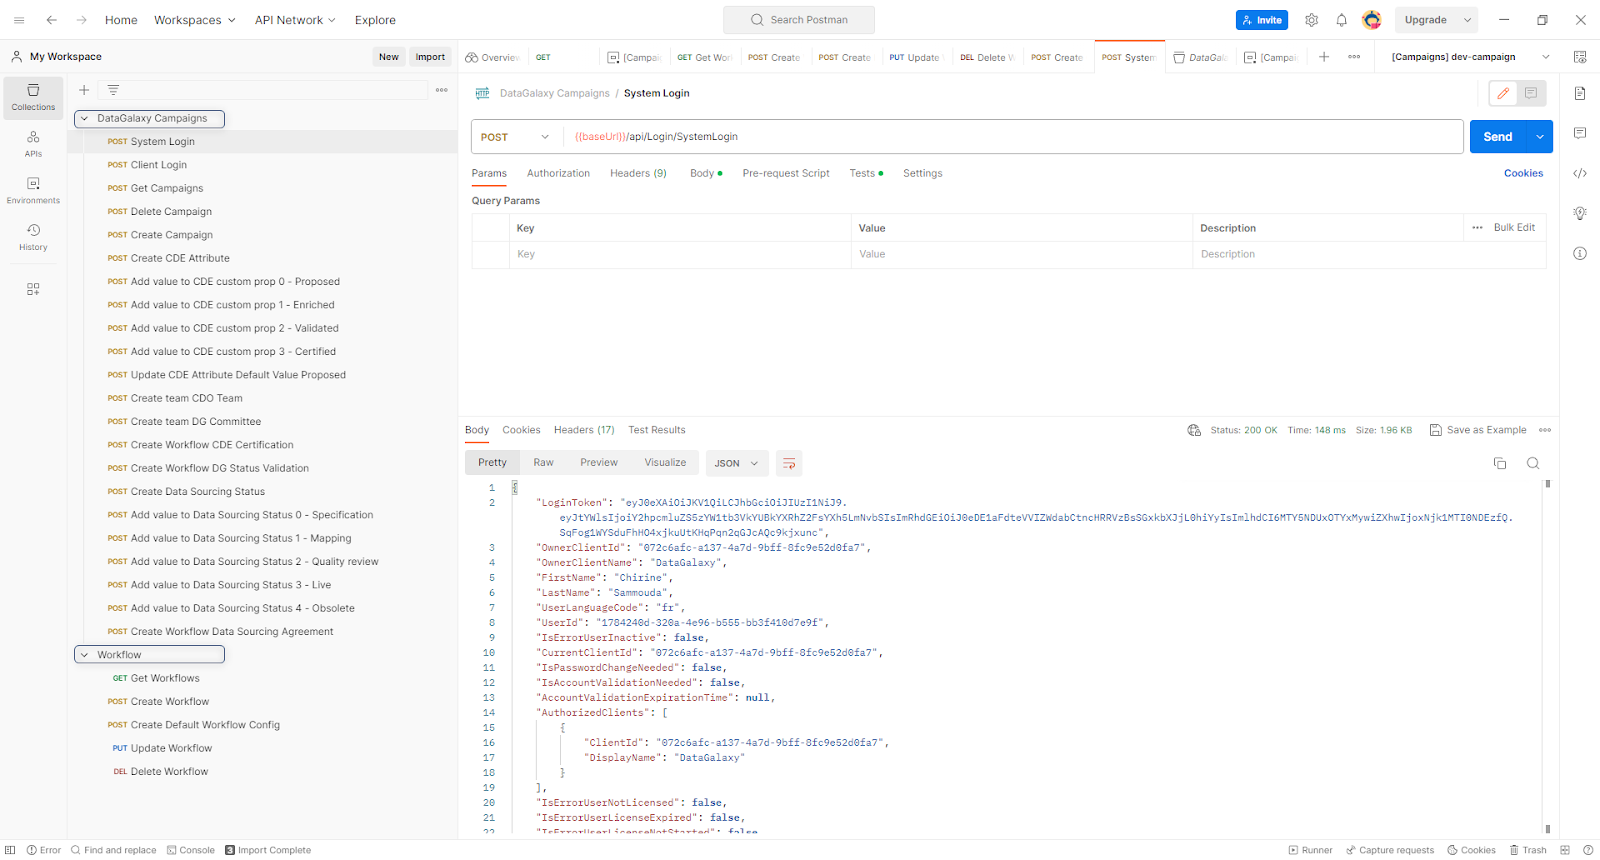
In the DataGalaxy Campaigns collection, you can configure your workflow (at workspace level) where you can define the operating rules of a process based on the following concepts:
- An object attribute is an element on which checks can be applied to trigger transitions. Often, this attribute takes the form of a status that enables the progress of the campaign to be tracked in detail at the level of each object.
- Campaign phases are stages designed to monitor the overall progress of the campaign. Each of these phases represents a specific stage in the progress of the campaign, providing an overview of its evolution.
- Transitions define the sequences for moving from one phase to another and specify the conditions required to activate them. These transitions describe the possible routes that objects in the campaign can take, depending on their current status and the rules defined, and it is also possible to return to a previous phase if necessary. This ensures that the campaign progresses efficiently and in accordance with the defined requirements.
- Individuals (who may be teams, roles, or specific users) are designated as responsible for carrying out certain tasks during a given phase. This means that within the workflow, clearly identified people or entities are responsible for taking specific actions at specific stages of the process.
At this stage, you should have completed the creation of your workflow, which prepares you to start creating your first campaign.
Creating a Campaign
Once your workflow has been created, you can start a new campaign. Unlike Workflows, campaign creation can be done directly in the platform and is part of the role of a Data Steward.
As a Data Steward, you need a Steward license and administrator access to the workspace. You can create a new campaign to monitor the certification process for objects in your data catalog. You need to provide essential information such as the name, the workflow, (pre-created via API or the default workflow) and a description when creating the campaign. These details are crucial for identifying and managing your campaigns effectively. In addition, the system automatically records the campaign creator and the time of its creation for complete traceability.
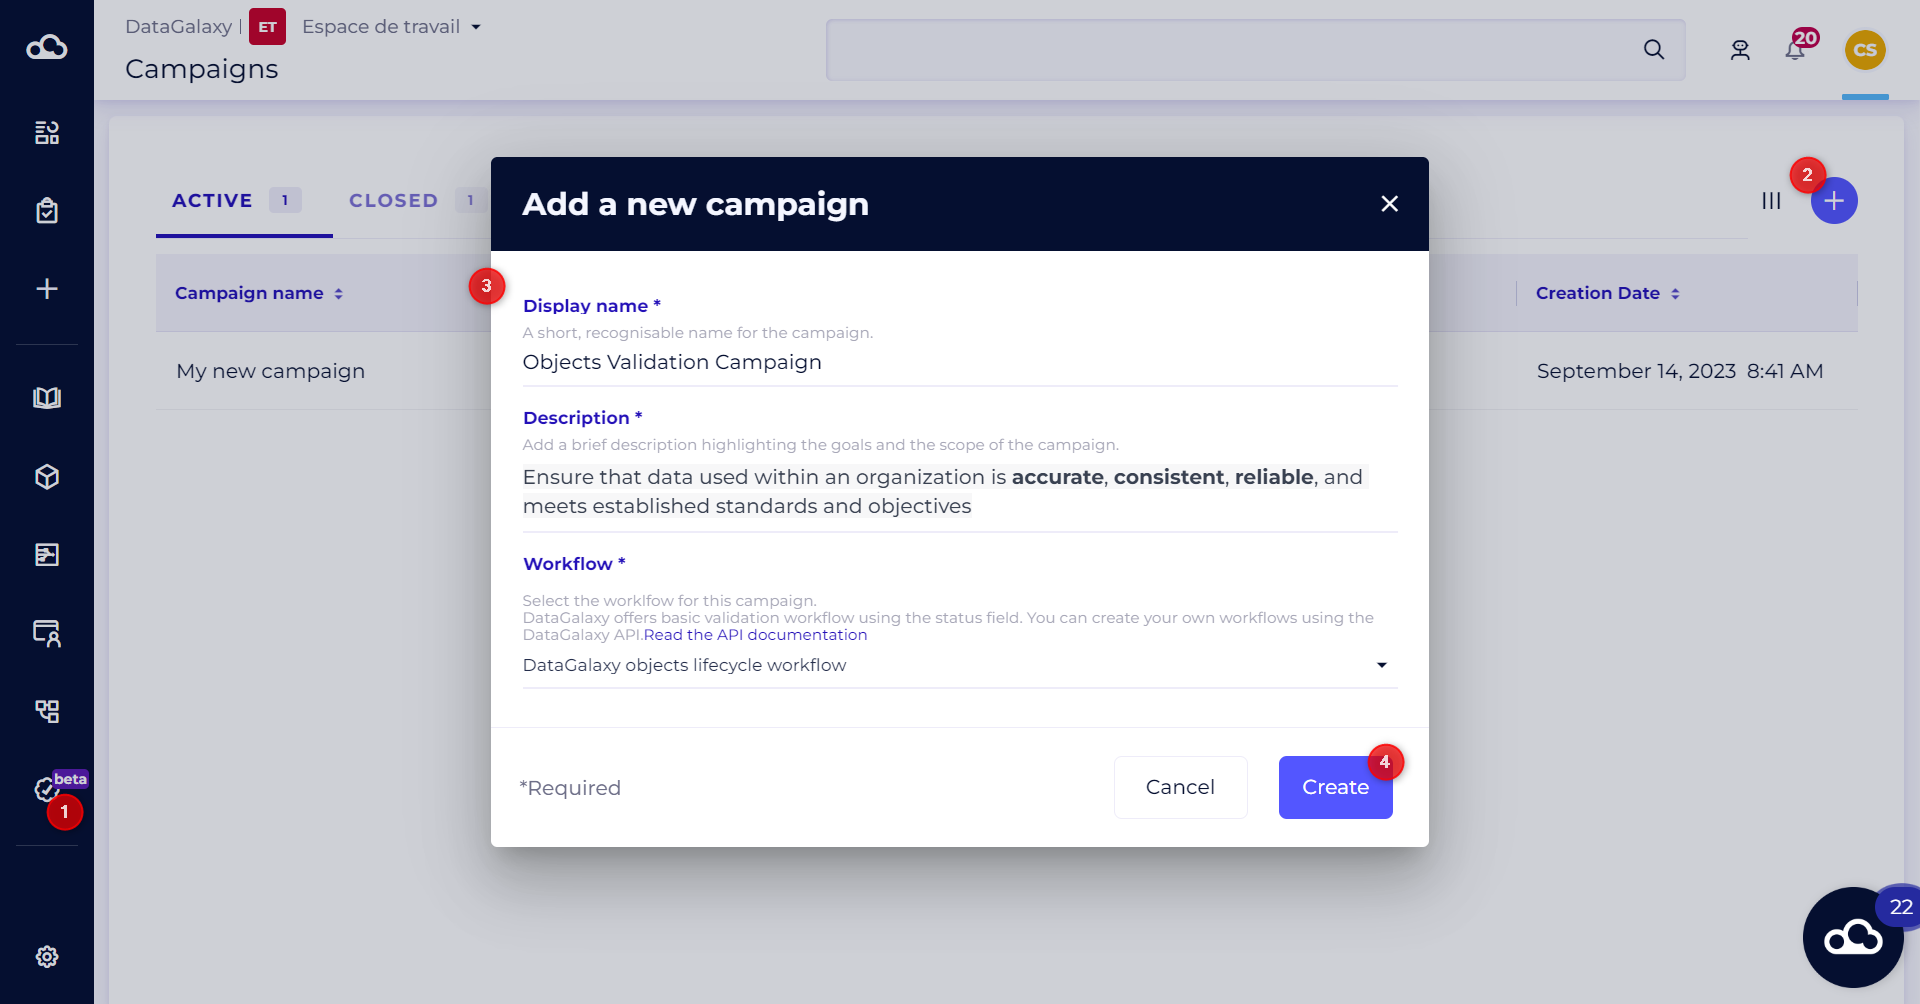
To do this, follow these steps:
- Access the Campaigns module from the sidebar
- Click on the "Add a new campaign" button or the (+) button at the top right of the screen
- Fill in the required information
- Click on “Create”
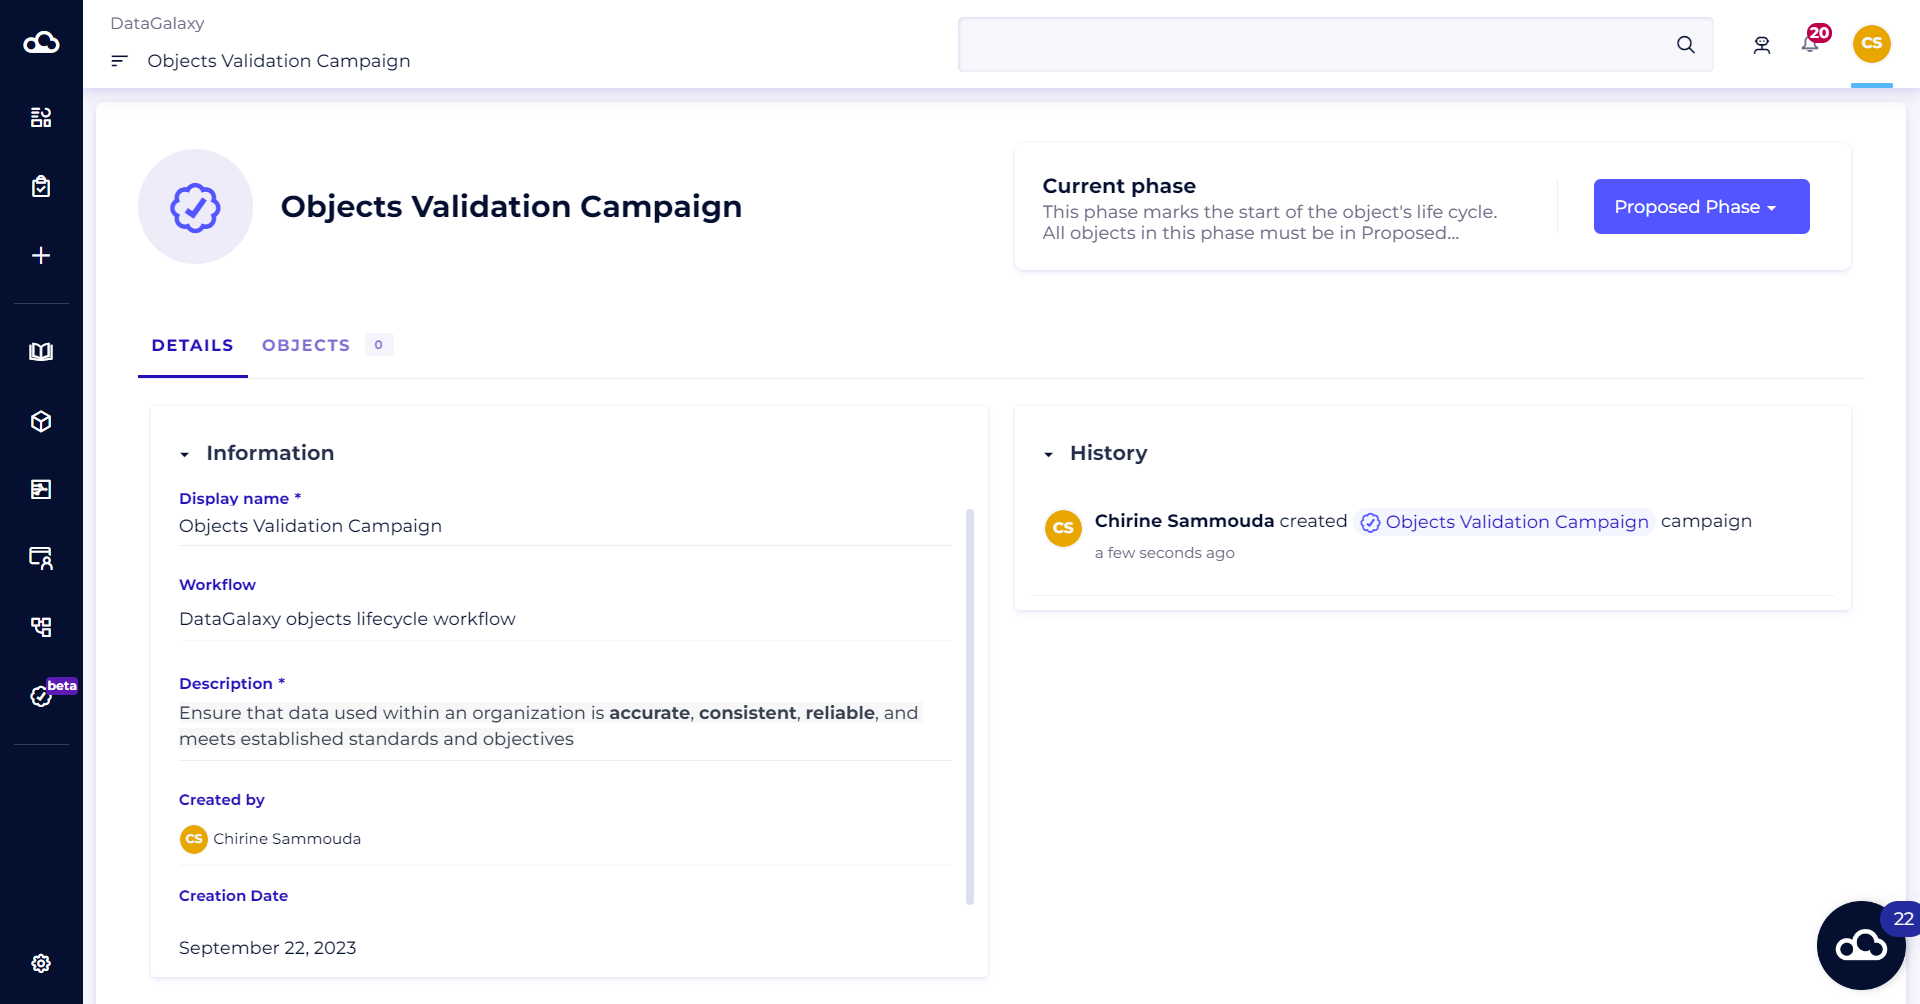
Once you have created your campaign, you will automatically be redirected to the campaign details screen, where you will find a full list of information relating to that specific campaign. If you have a Steward-level license and administrator rights, you will be able to change the campaign name and
description as you wish.
Adding Objects to a Campaign
As a Data Steward, the next step is to define the scope of objects to be certified. When you access the Campaign Objects tab, you will be able to add elements that are related directly to the campaign.
This feature allows you to enrich your campaign by associating objects that are relevant to your campaign.
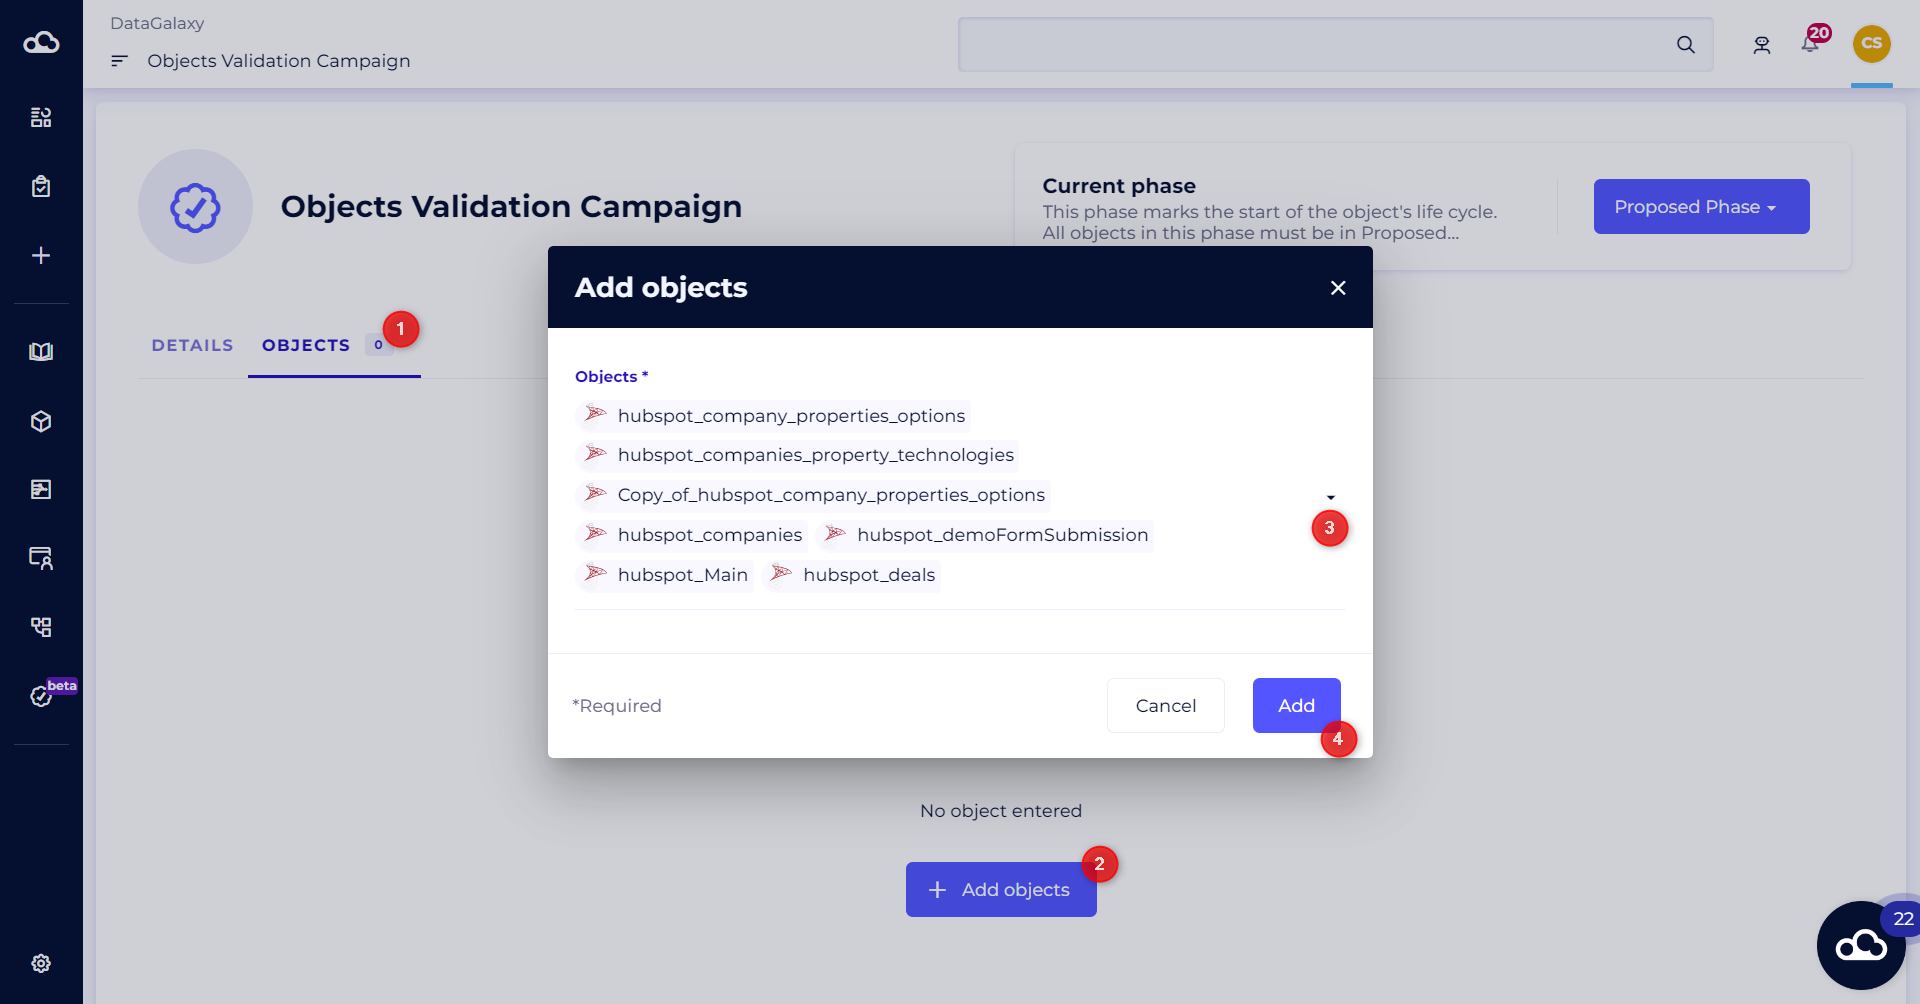
To do this, follow the steps below:
- Go to the "Objects" tab
- Click on the "Add objects" button or the (+) button at the top right of the screen
- Select the objects of your choice from the menu
- Click on the "Add" button
You can add objects from any module to your campaign, and you can add objects to your campaign while the campaign is running - As long as it hasn't been completed.
An important point to note is that all Stewards administering the workspace have the ability to add or remove items included in the campaign.
Once you have defined the selection of objects to be certified or validated, your teams will be ready to provide the necessary information for each object. One option available is to assign a specific team to each phase when configuring the workflow via the API.
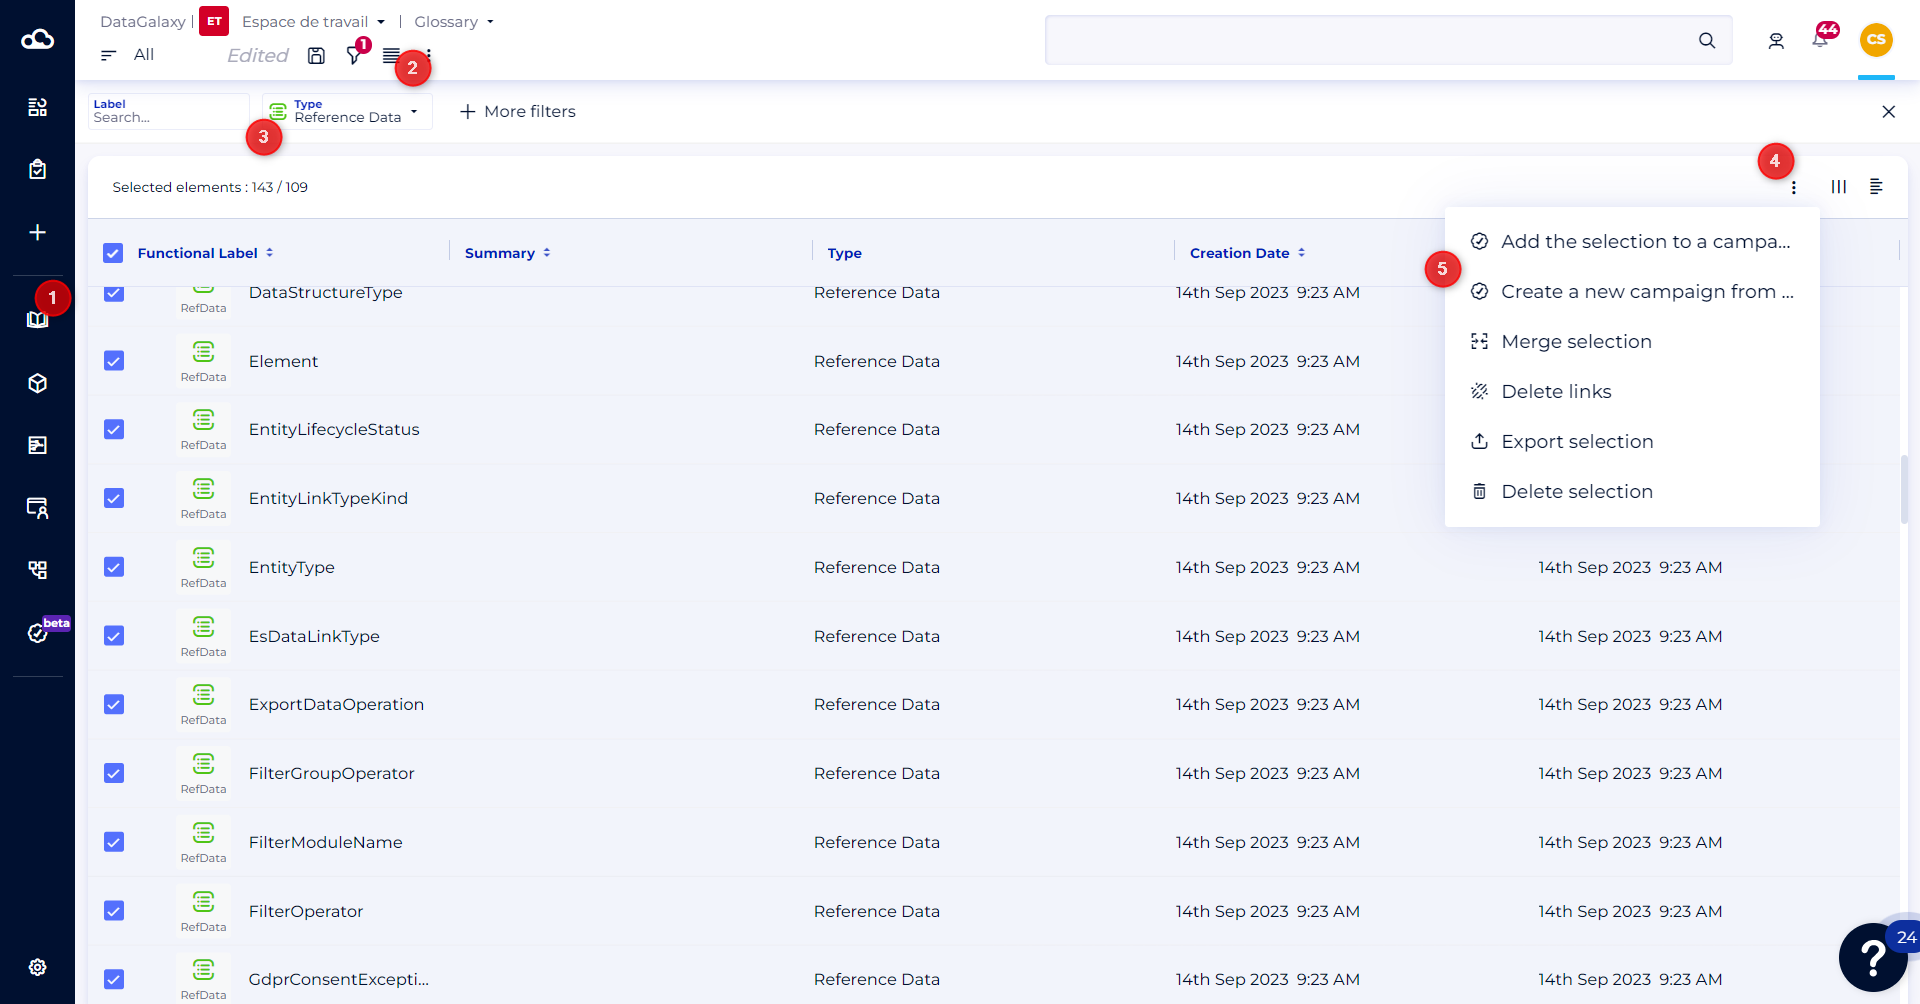
You can also add objects to a campaign in bulk, from the tabular views of the 4 modules.
To do this, follow the steps below:
- Access a module
- Access the tabular view
- Apply the filters of your choice to find the objects you're interested in
- Click on the burger menu at the top right of the screen
- Click on
- Add selection to a campaign
- or
- Create a new campaign with the selection
If you choose the "Add selection to a campaign" option, all selected objects will be added to an existing campaign.
If you choose the "Create a new campaign with the selection" option, then the system will suggest you create a new campaign in this workspace.
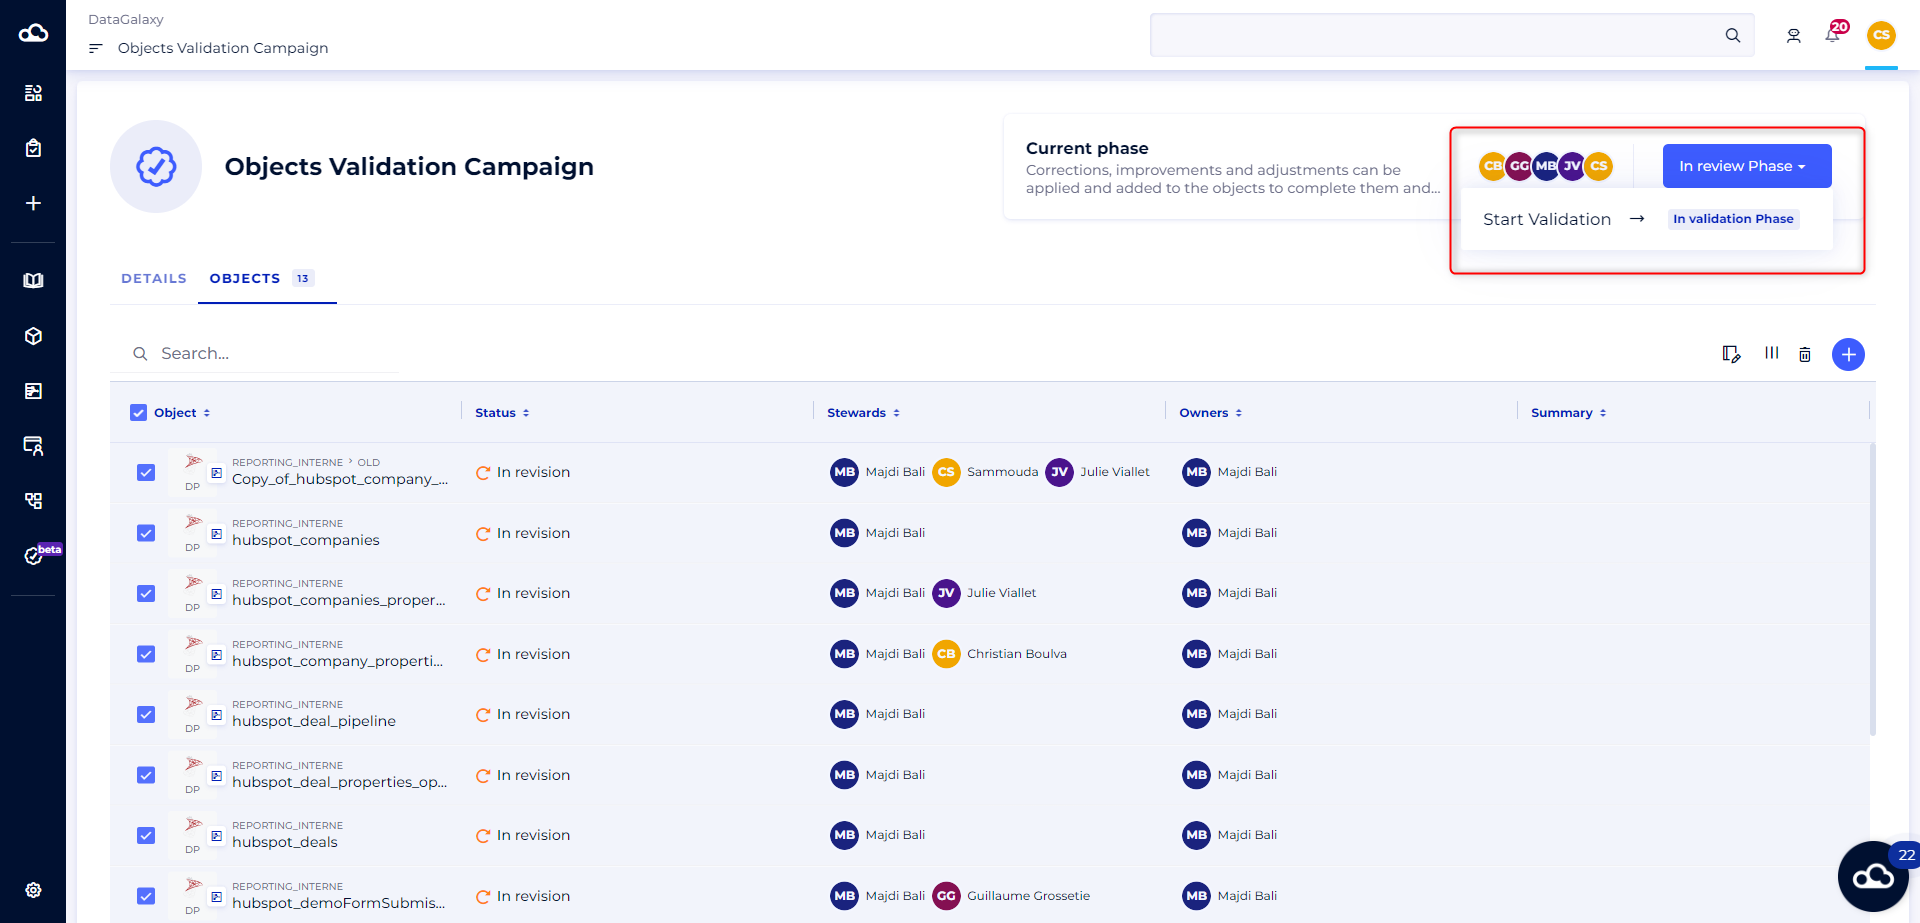
The Campaign Process
Example of a campaign using the default DataGalaxy objects lifecycle workflow
This campaign focuses on the validation of objects in DataGalaxy, based on the proposed statuses: in revision, in validation and validated.
In the scenario of this workflow, the assignees of each phase are automatically defined based on the Stewards of the objects selected in the campaign.
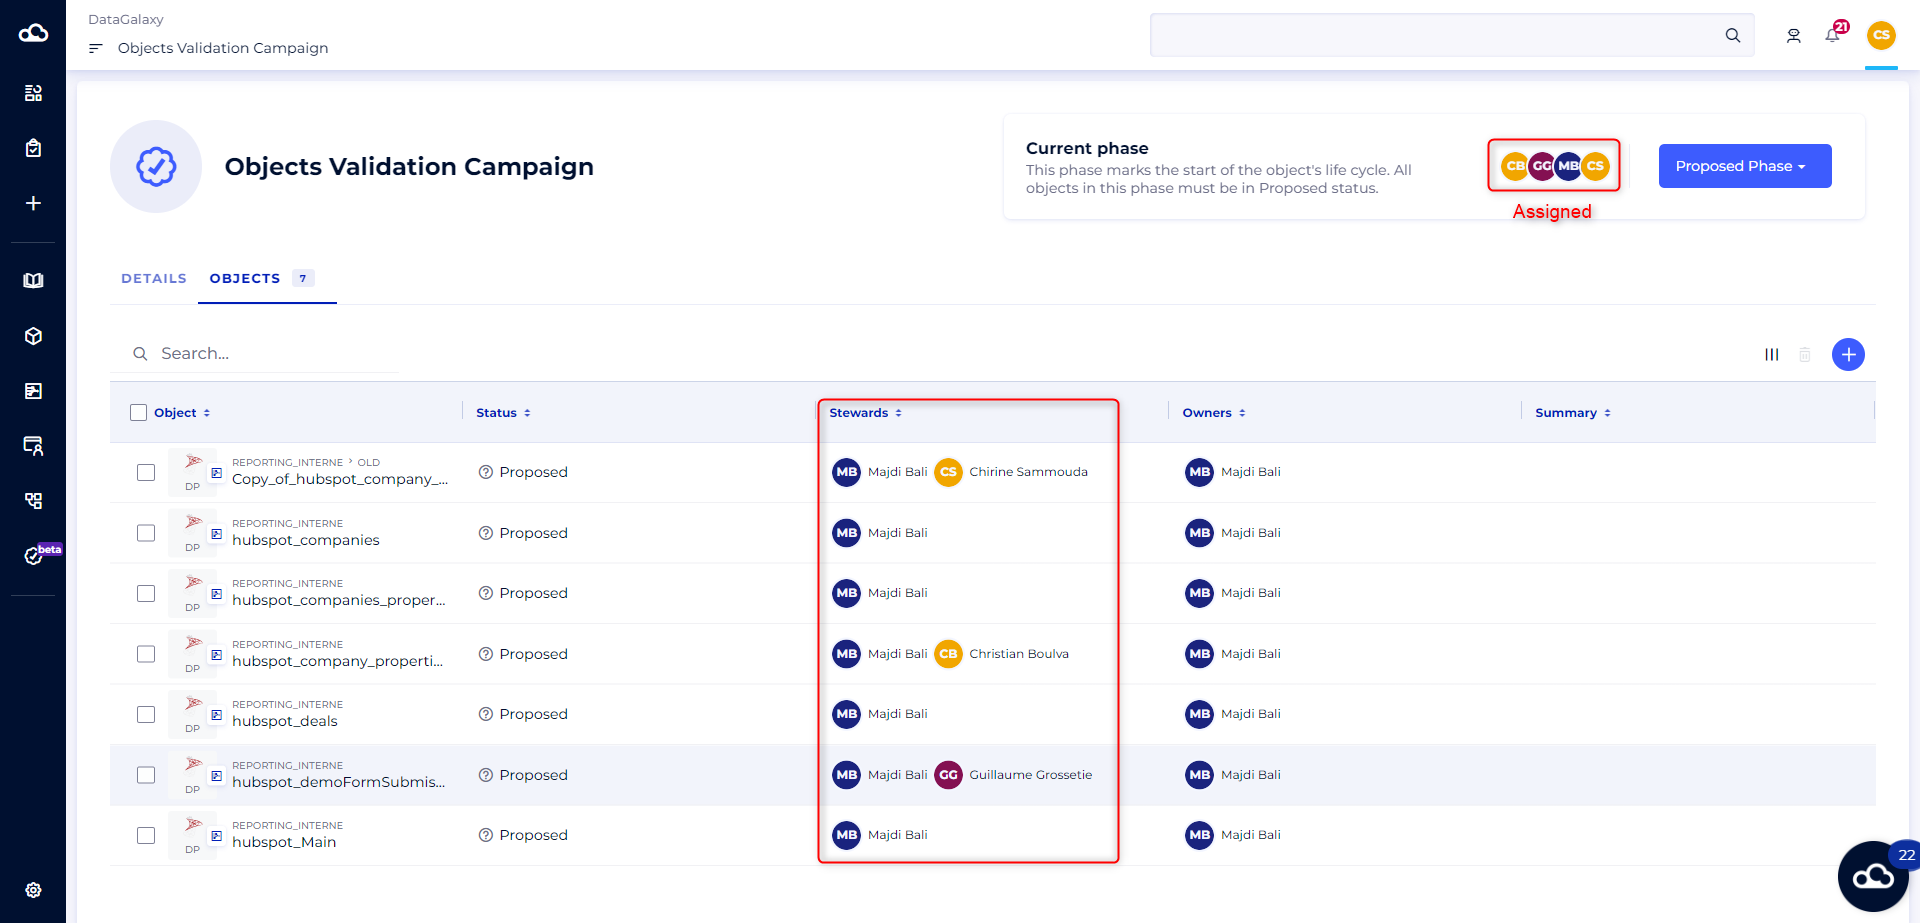
The assignees receive automatic notifications both in the application and by email to inform them about their responsibilities in each phase of the campaign.
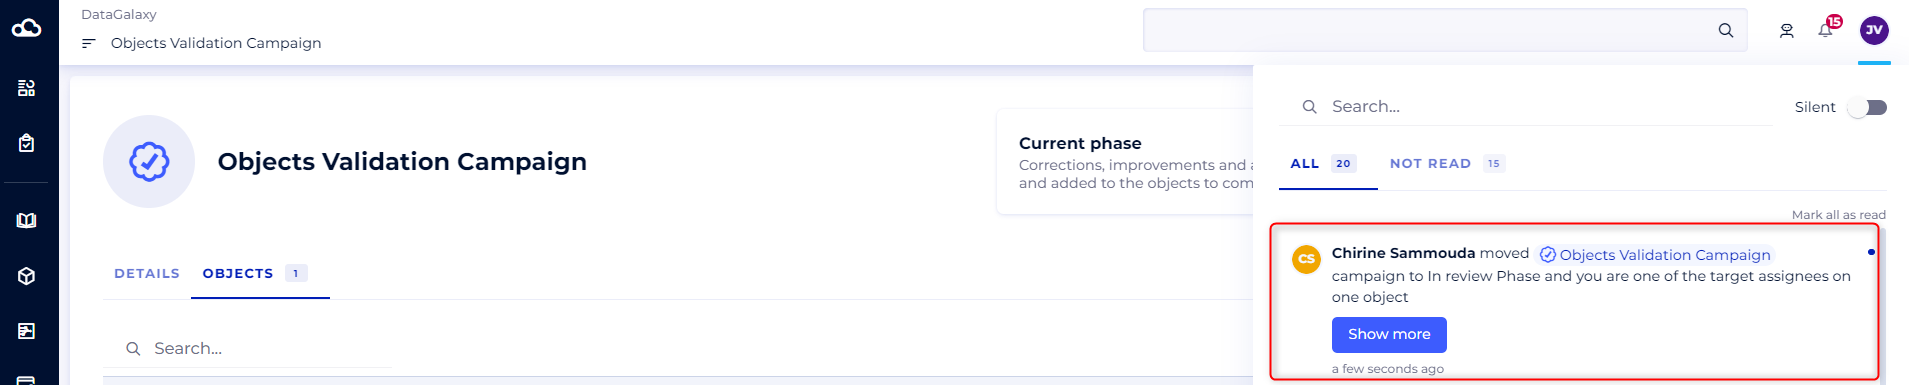
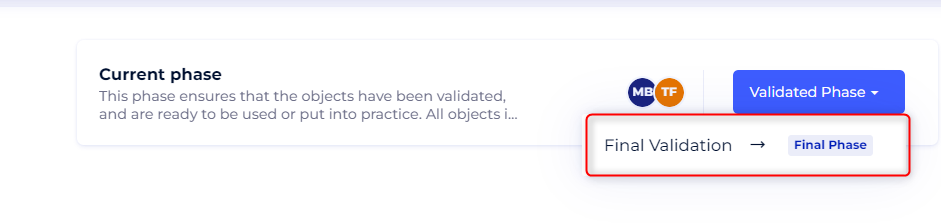
When all the objects have met the criteria and requirements for the current phase, the Steward can move the campaign on to the next phase. Those assigned to the phase will be notified again.
When the whole process has been completed and all the objects involved in the campaign have met the criteria and requirements set, they can be considered "Validated." At this stage, the Steward can close the campaign.
Closing the campaign represents the final phase of the certification process. It indicates that all the goals and checks set have been successfully completed, which means that the certified objects are ready to be used with complete assurance. This step is essential to ensure that the campaign has achieved its purpose, that the data is correct and that all stakeholders can have full trust in the integrity of the certified objects within DataGalaxy.

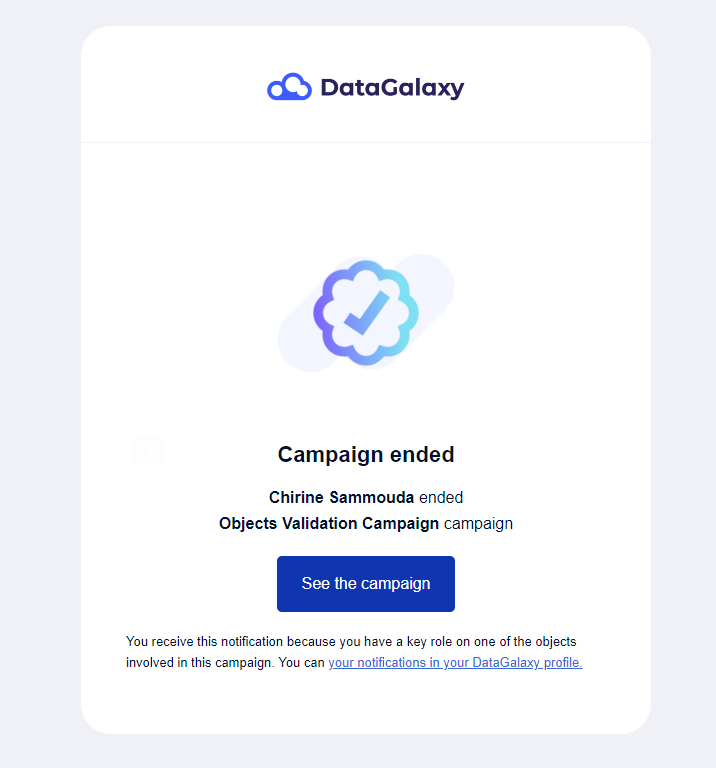
Stewards will be notified of the end of the campaign by email and in the application's notification center.
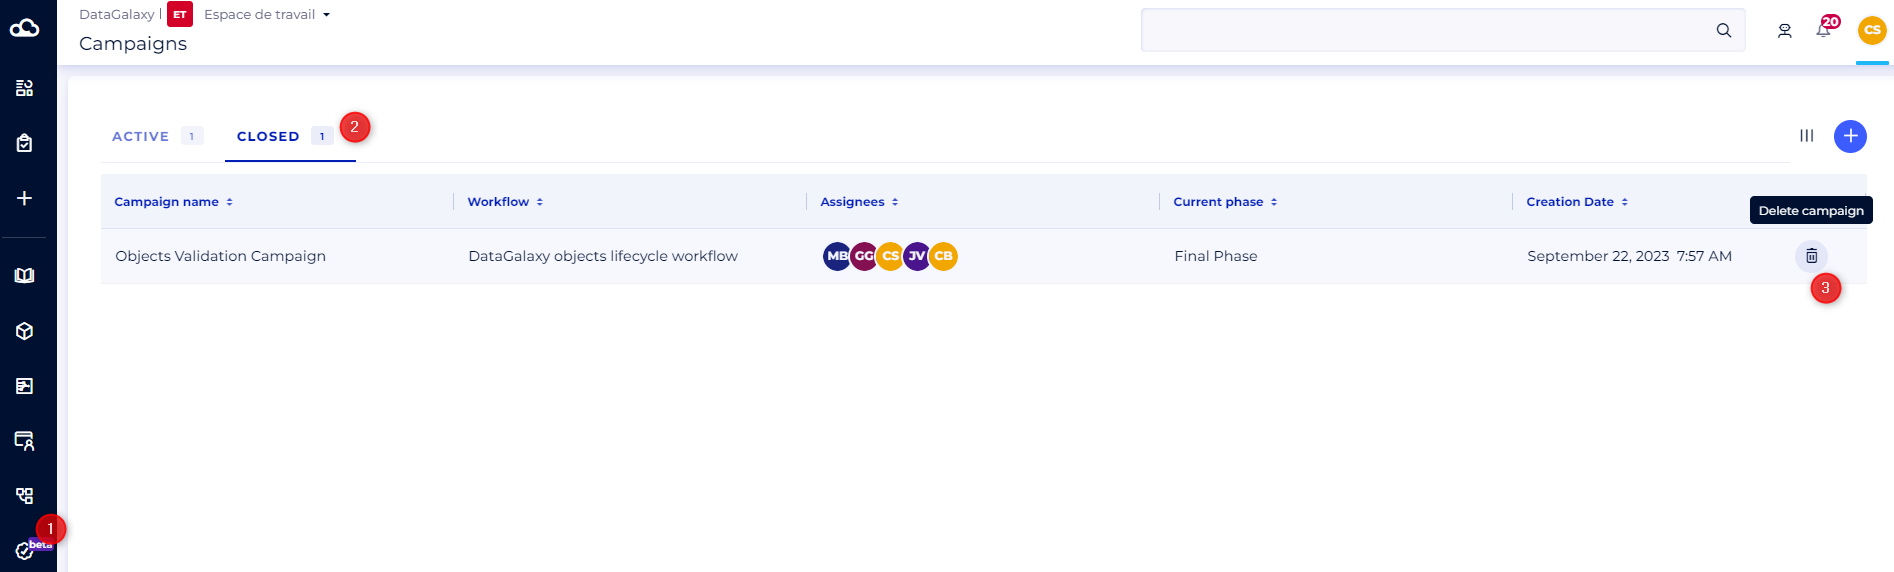
Completed campaigns can be accessed in the "Completed" tab of the Campaigns module. However, it is important to note that in this phase, you can no longer make changes to campaign objects or information - The associated data and configurations are frozento ensure the integrity of the certification/validation.
However, it’s possible to delete a completed campaign definitively if required. This allows you to keep your working environment organised by deleting campaigns that are no longer relevant or necessary.
Known bugs in this beta
As with any beta release, this one may contain some bugs and imperfections. We are aware that these issues may affect your day-to-day use of the feature, and we are committed to fixing them quickly.
- If you select objects from a module's tabular view and try to add them to an existing campaign, but one or more objects are already included in the campaign, an error message is displayed. You must remove the objects already belonging to the campaign from the selection to be able to continue the action.
- If you delete a team or users assigned to a workflow, the workflow then becomes unusable.
- If you delete an attribute or attribute value used in a workflow configuration, the workflow then becomes unusable.