Important Recommendations:
When setting up self-service SSO, it is strongly recommended to ask all users to log out and avoid logging in during the entire configuration process. This helps prevent any authentication issues or conflicts.
Additionally, as the administrator configuring the SSO, do not force your own logout, the system will handle it and prompt you to log back in.
Ensure that only one configuration is in progress. Avoid having two or more administrators perform the configuration simultaneously.
Once the setup is complete, you can invite users to log in normally.
SSO Self service overview
The SSO Self-Service feature allows your administrators to independently configure Single Sign-On (SSO) for your organization using popular identity providers such as Okta, Azure, Google, Keycloak, ADFS, and many others. It supports both OIDC and SAML protocols, ensuring compatibility with a wide range of security configurations.
This feature also includes Just-In-Time (JIT) provisioning, which streamlines user onboarding by automatically creating accounts and assigning Reader licences upon authentication.
Purpose of using this feature
This self-service approach eliminates the need for external support, giving your organization greater control and flexibility in managing its security requirements.
Who can use it and where?
This feature is available to all clients who have subscribed to the SSO option. Please contact your Account Manager if you want to activate it.
Configuration is done within the Client Space Administration, under the Security section. The user must have Client Space Administrator rights to access this option.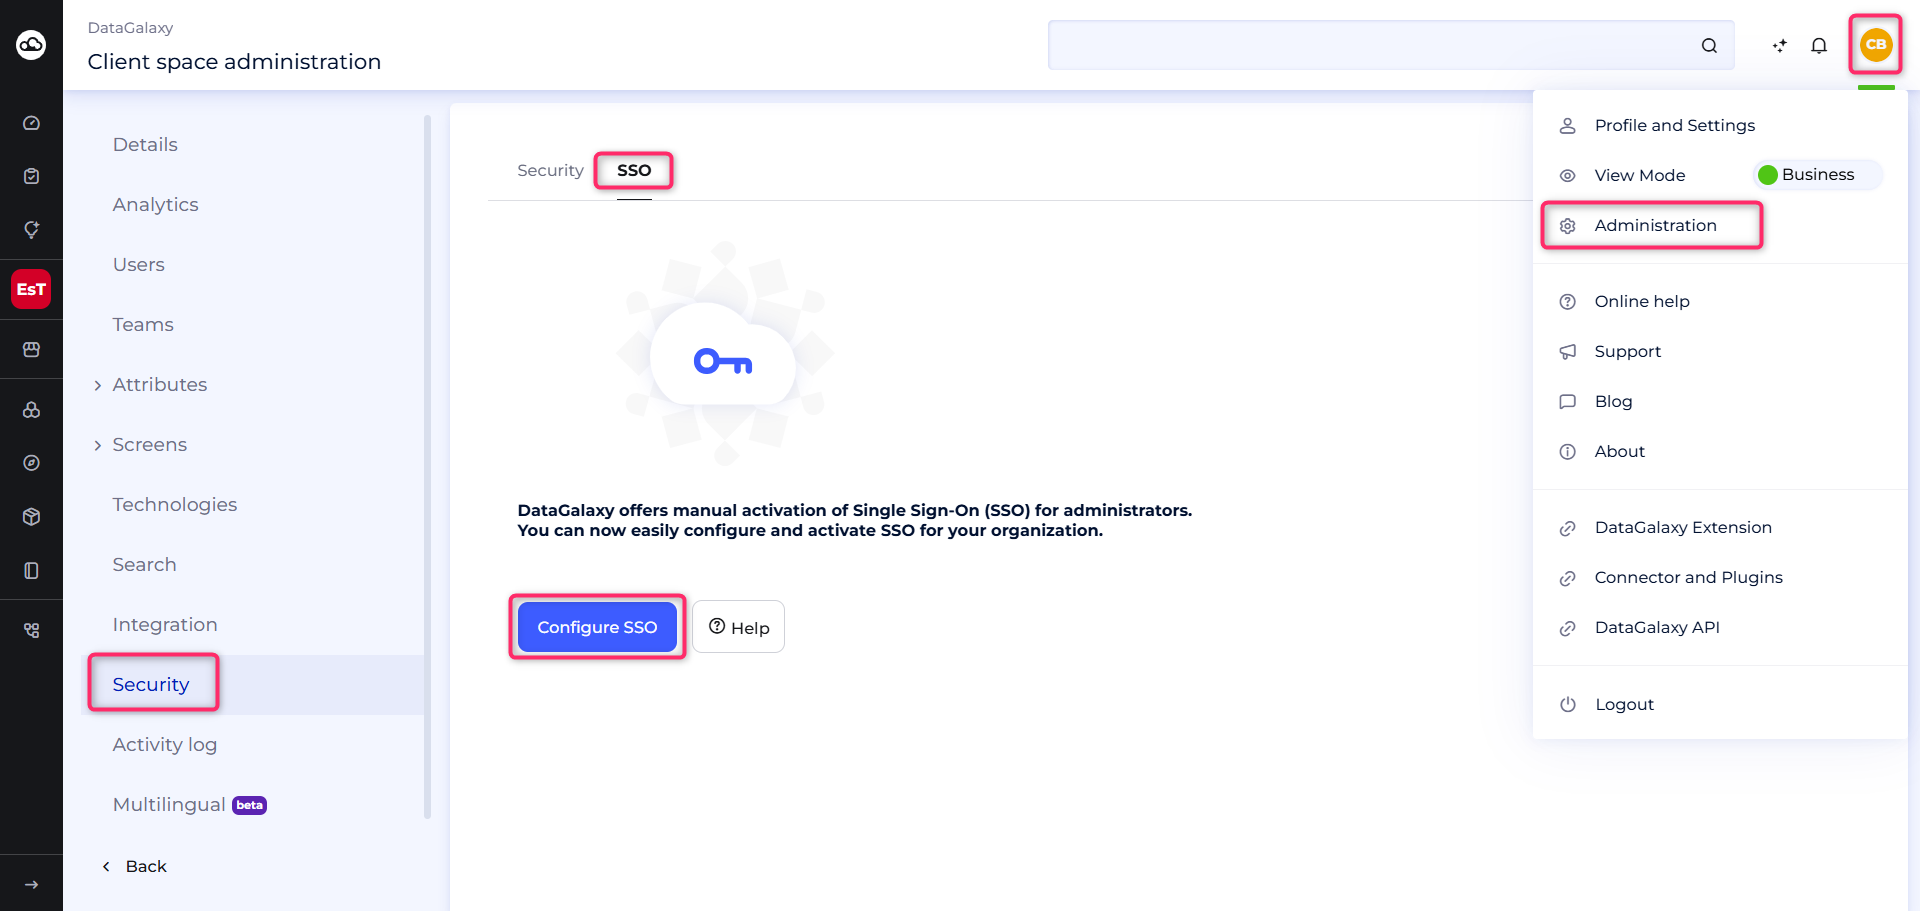
How to configure SSO ?
To set up your Single Sign-On (SSO), follow these steps :
- In the Client Space Administration, go to the Security tab and click Configure Single Sign-On (SSO).
- Click Next to begin the configuration process
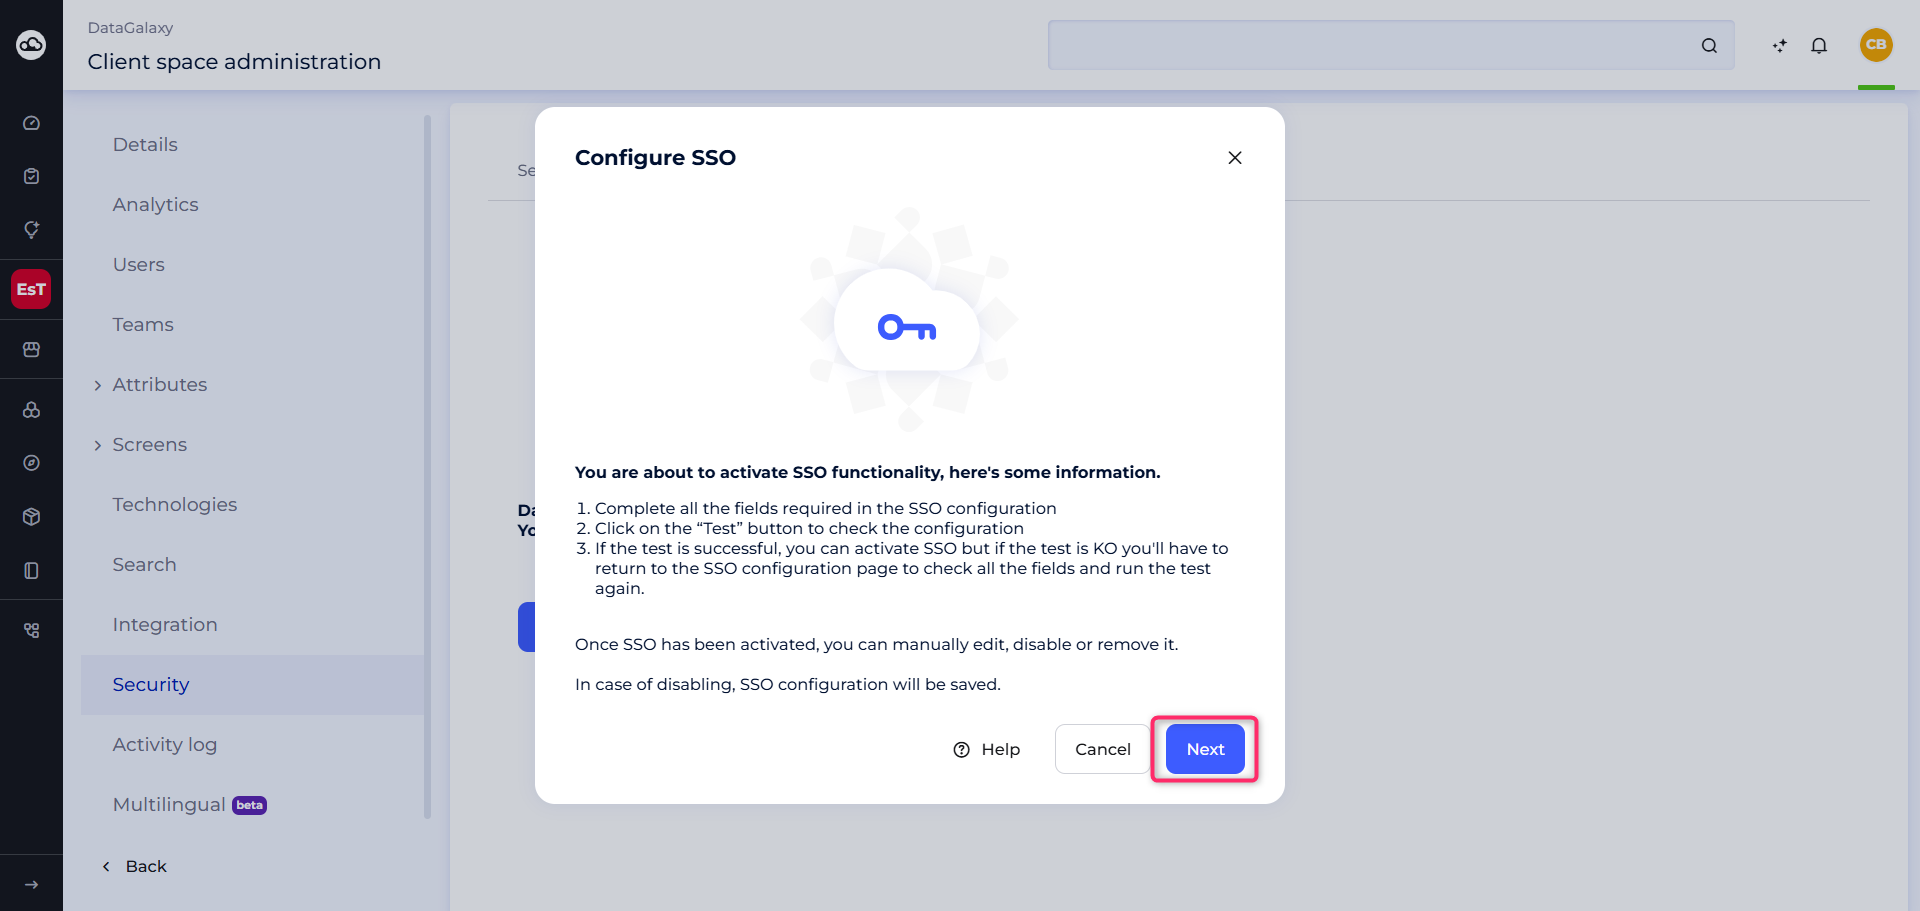
- Fill in all required fields according to the selected protocol (OIDC or SAML). Please refer to the article How to set Up SSO in a Dedicated Environment? for the necessary configuration details
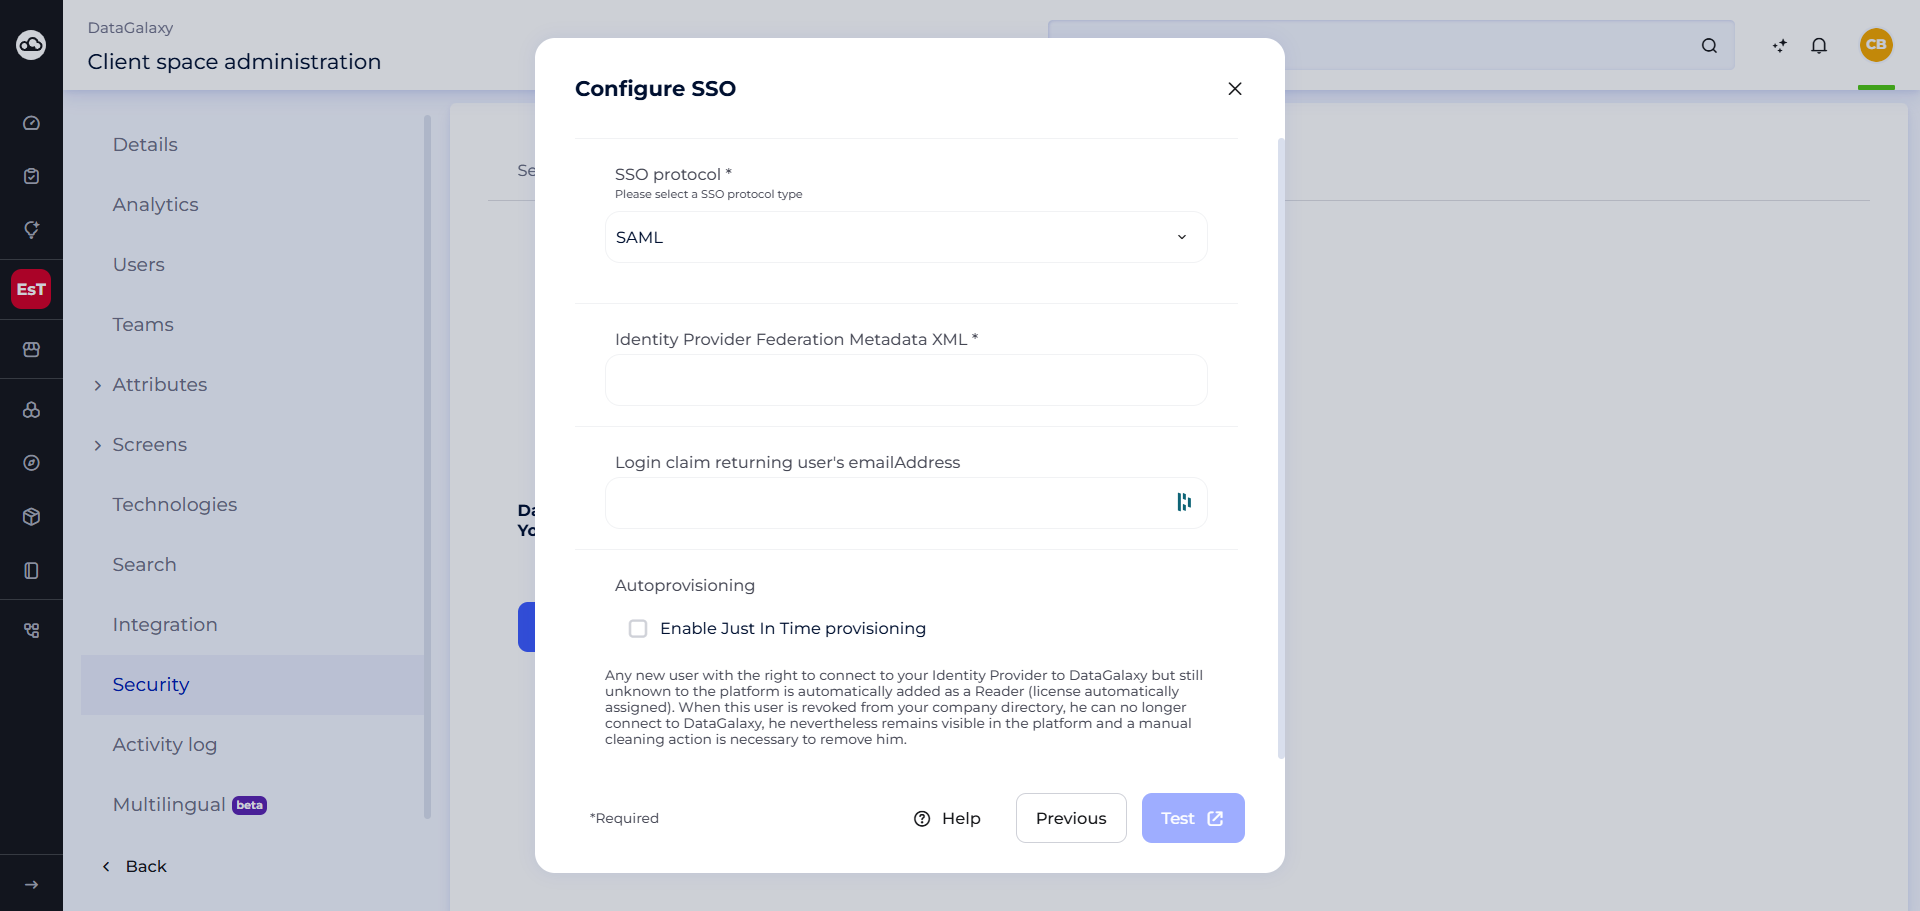
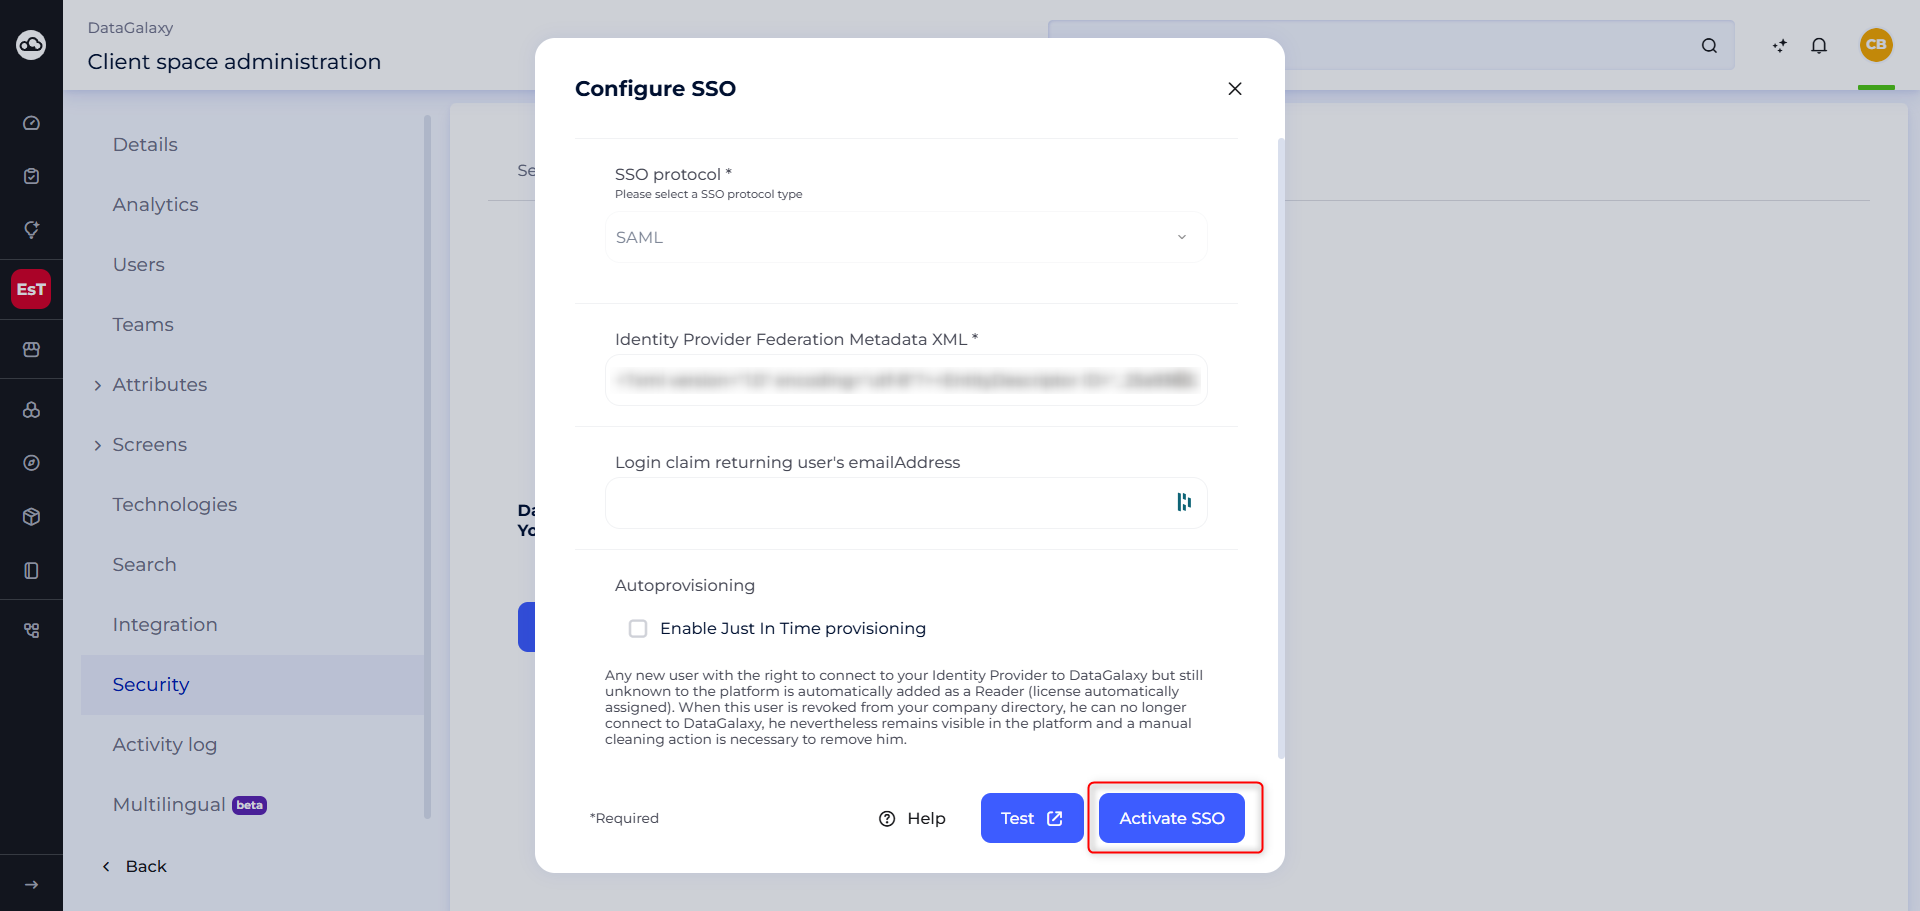
- Click “Test” to verify the configuration
- If the test is successful, a window will open to confirm that your SSO test has passed. Close it, then click “Activate SSO” to finalize the configuration.
If the test fails, return to the configuration modal, check all fields, and run the test again.
Once SSO is configured :
- You will be automatically redirected to the login page to authenticate again
- Existing integration tokens and PATs will become invalid and must be regenerated
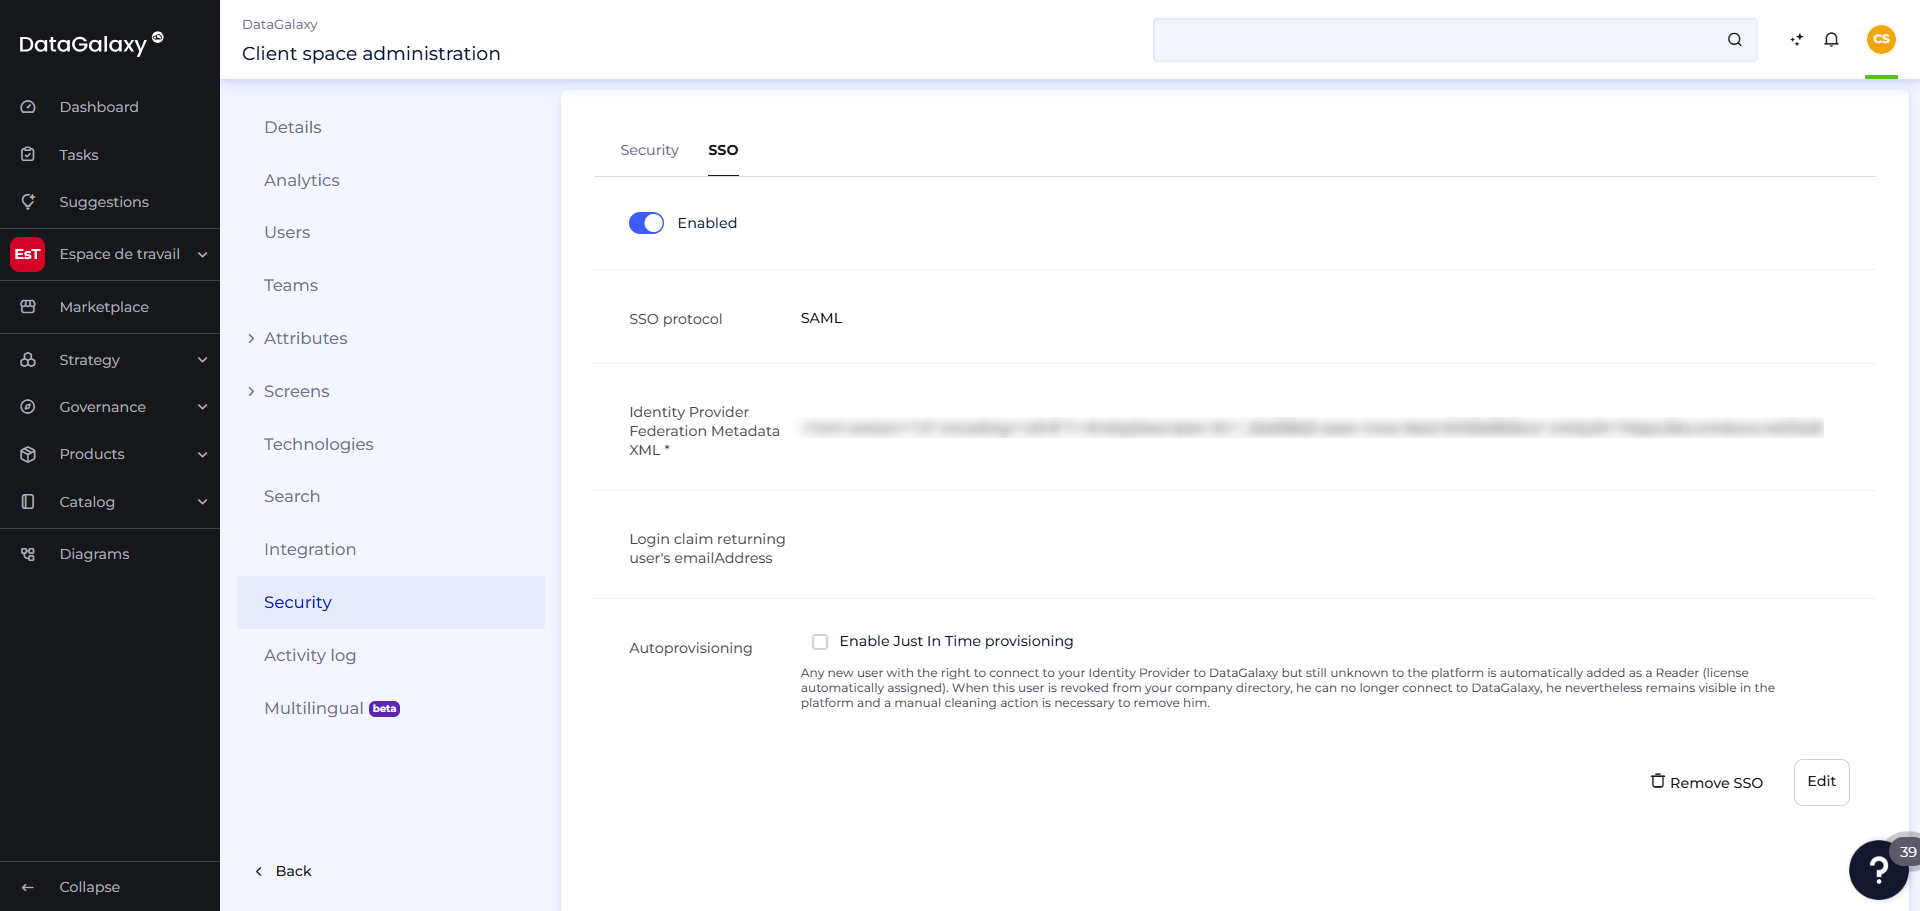
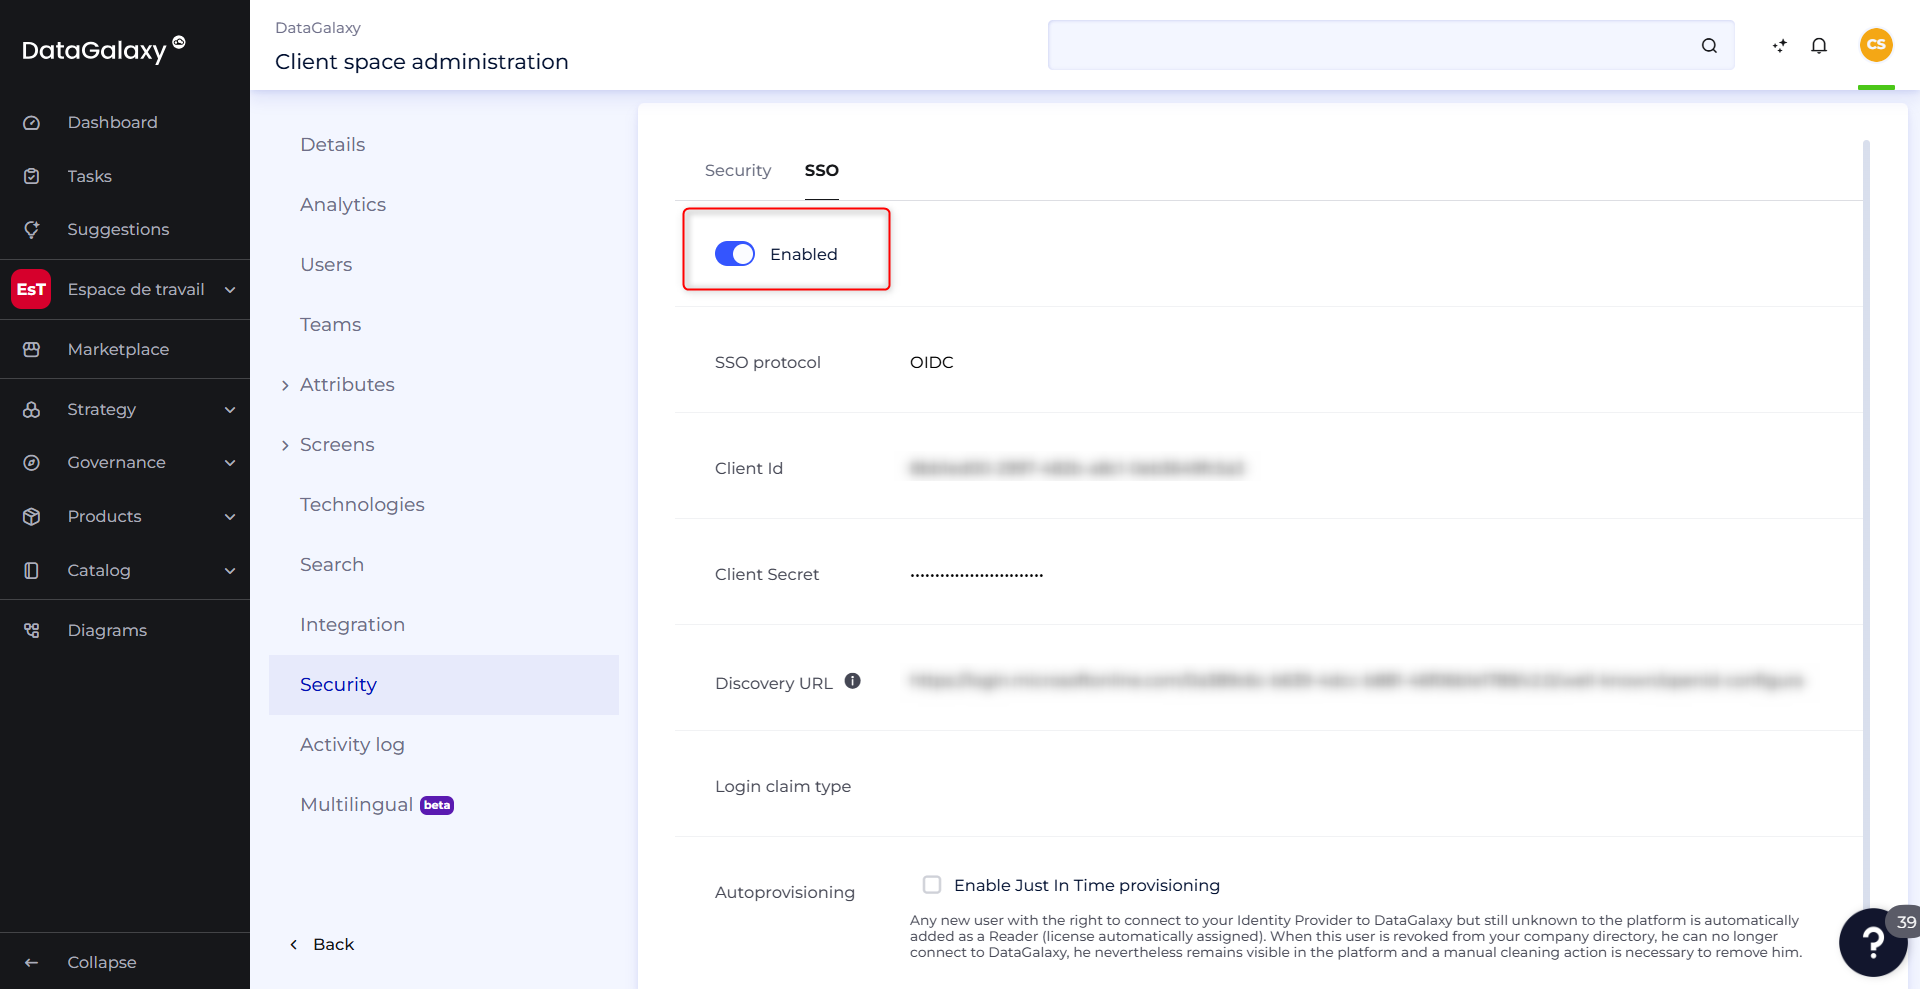
- Configuration details can be viewed under the SSO tab in the Security section
How to Remove SSO ?
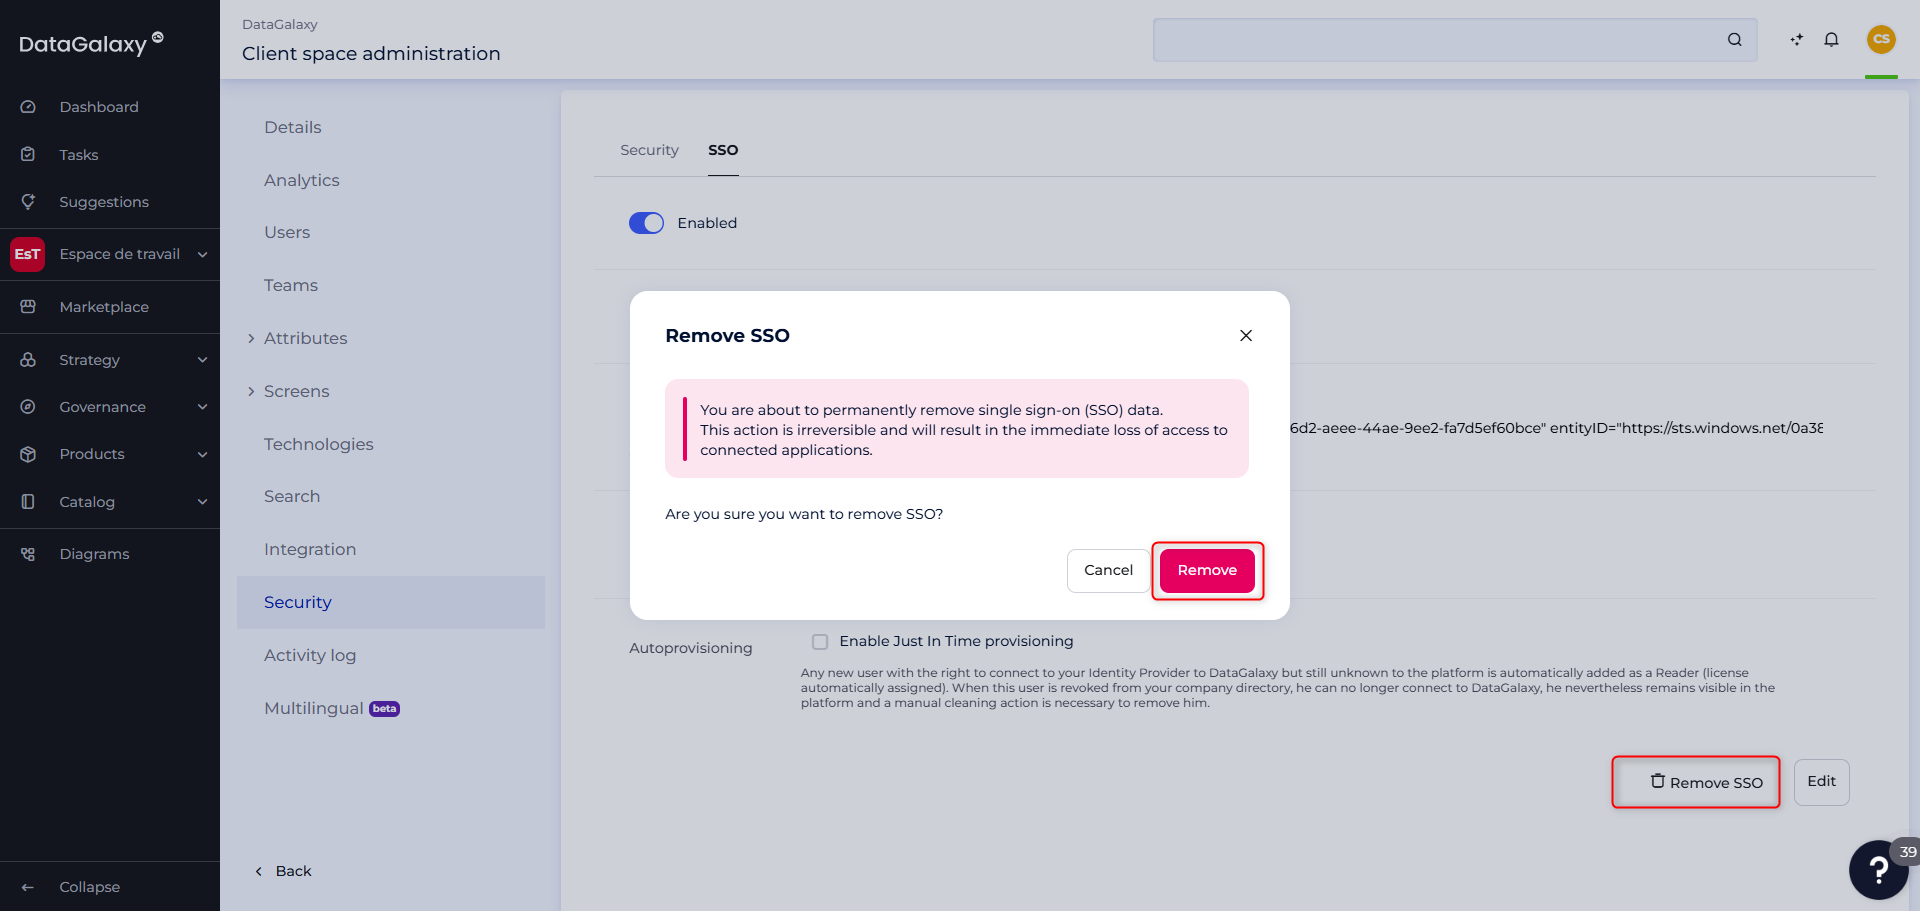
You can permanently remove SSO if needed. A new configuration will be required to reactivate it. To remove an already configured SSO:
- Click the “Remove” button at the bottom right
- Confirm the removal by clicking “Remove” again in the pop-up window.
Once SSO is removed:
- You will be automatically redirected to the login page to authenticate again.
- Existing integration tokens and PATs will become invalid and must be regenerated.
How to Disable SSO ?
You can temporarily disable Single Sign-On (SSO) for various reasons, such as performing actions via a support account or conducting specific tests. This feature allows you to suspend SSO authentication without losing the existing configuration.
To temporarily disable SSO:
- Go to the SSO tab in your interface
- Toggle the “Disabled” button on the screen
How to Enable SSO ?
As with Disable, it is possible to reactivate SSO without having to reconfigure it. Any previously entered information will remain saved.
To reactivate SSO:
- Go to the SSO tab in your interface.
- Toggle the “Enabled” button that appears on the screen
