The purpose of this article is to explain the different possibilities of managing users at the clientspace level:
- Create a new user
- Manage licenses
- Import and export users
- View the last modified objects
- View accesses at workspace level
To understand the relationship between licenses and authorizations, read this article.
Who can manage the users of the clientspace?
Only clientspace administrators have access to this feature. The allocation of administration rights for a new user is described later in this article.
NB: The notions of clientspace administrator and workspace administrator are separate.
How to access the clientspace user management page?
To navigate to the user management page of the clientspace you must:
- Click on the icon at the top right of the screen
 Click on Administration in the drop-down list
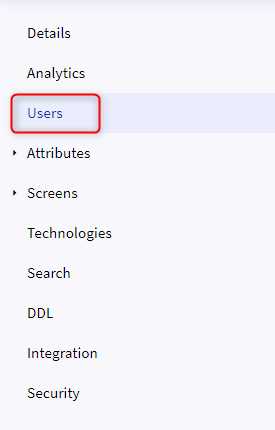
- Click on the Users section in the menu on the left of the screen
- Once on the page that lists the users of the clientspace, you have the possibility to filter these users by license, by first connection date and by last connection date.
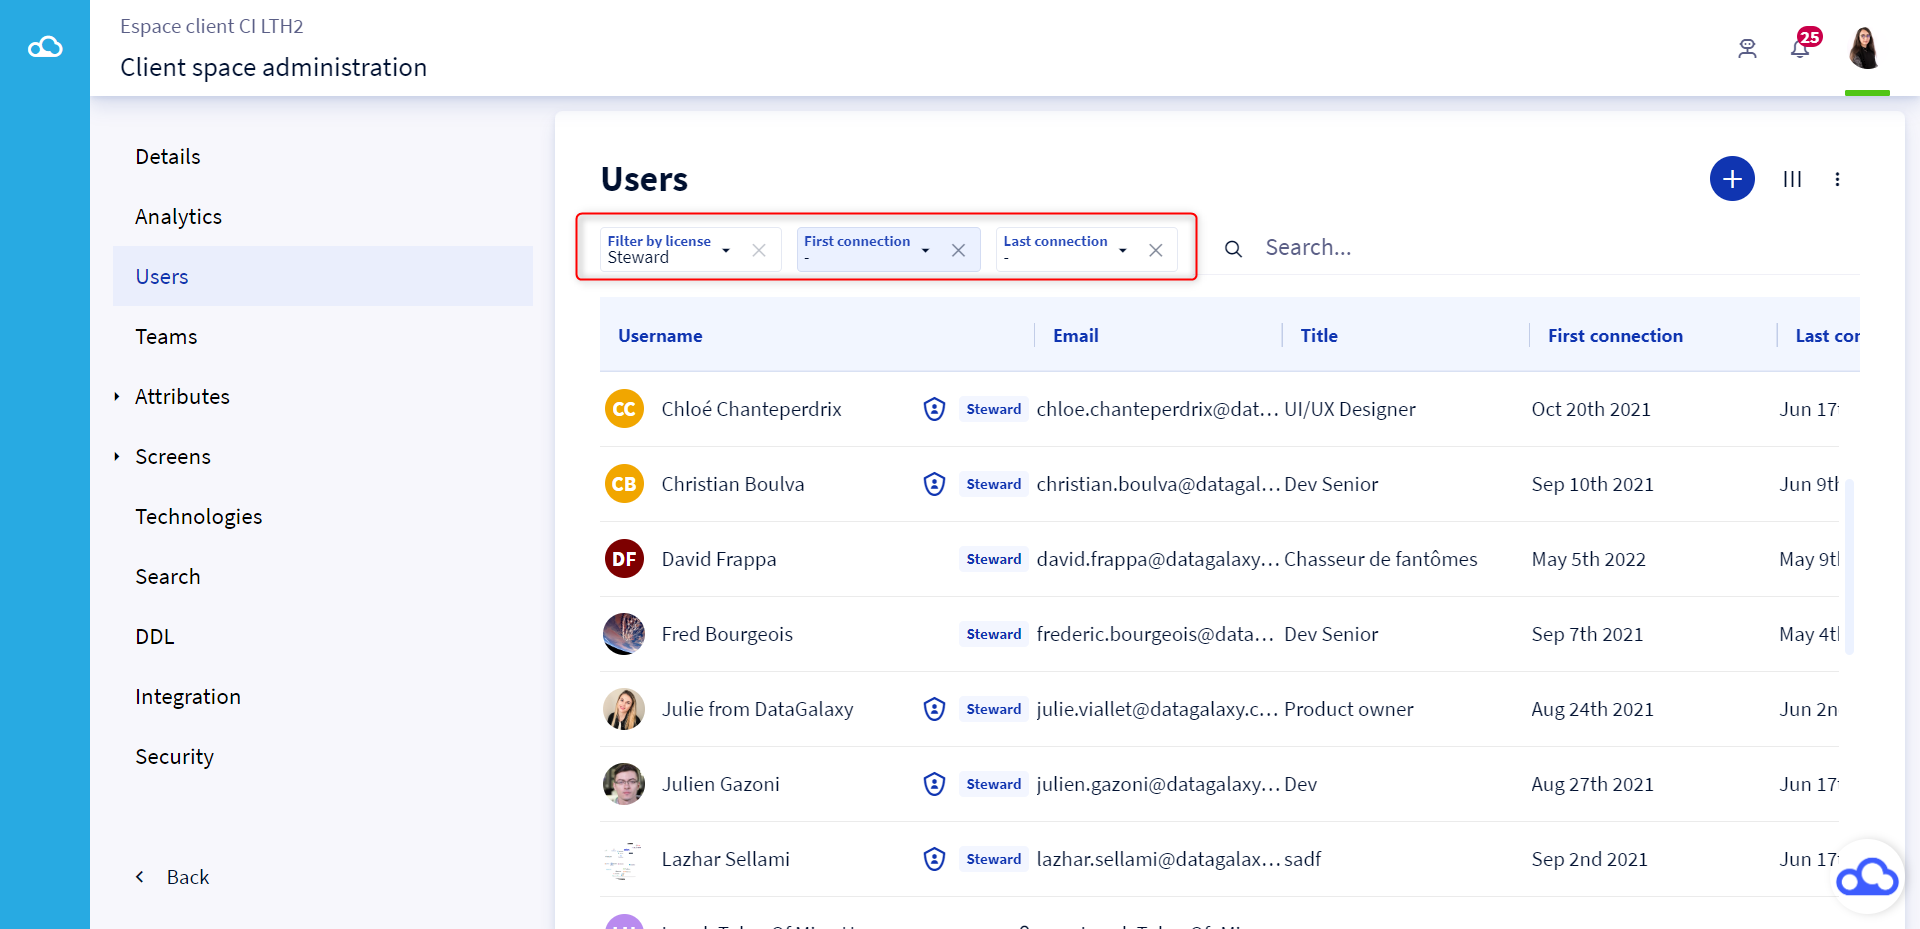
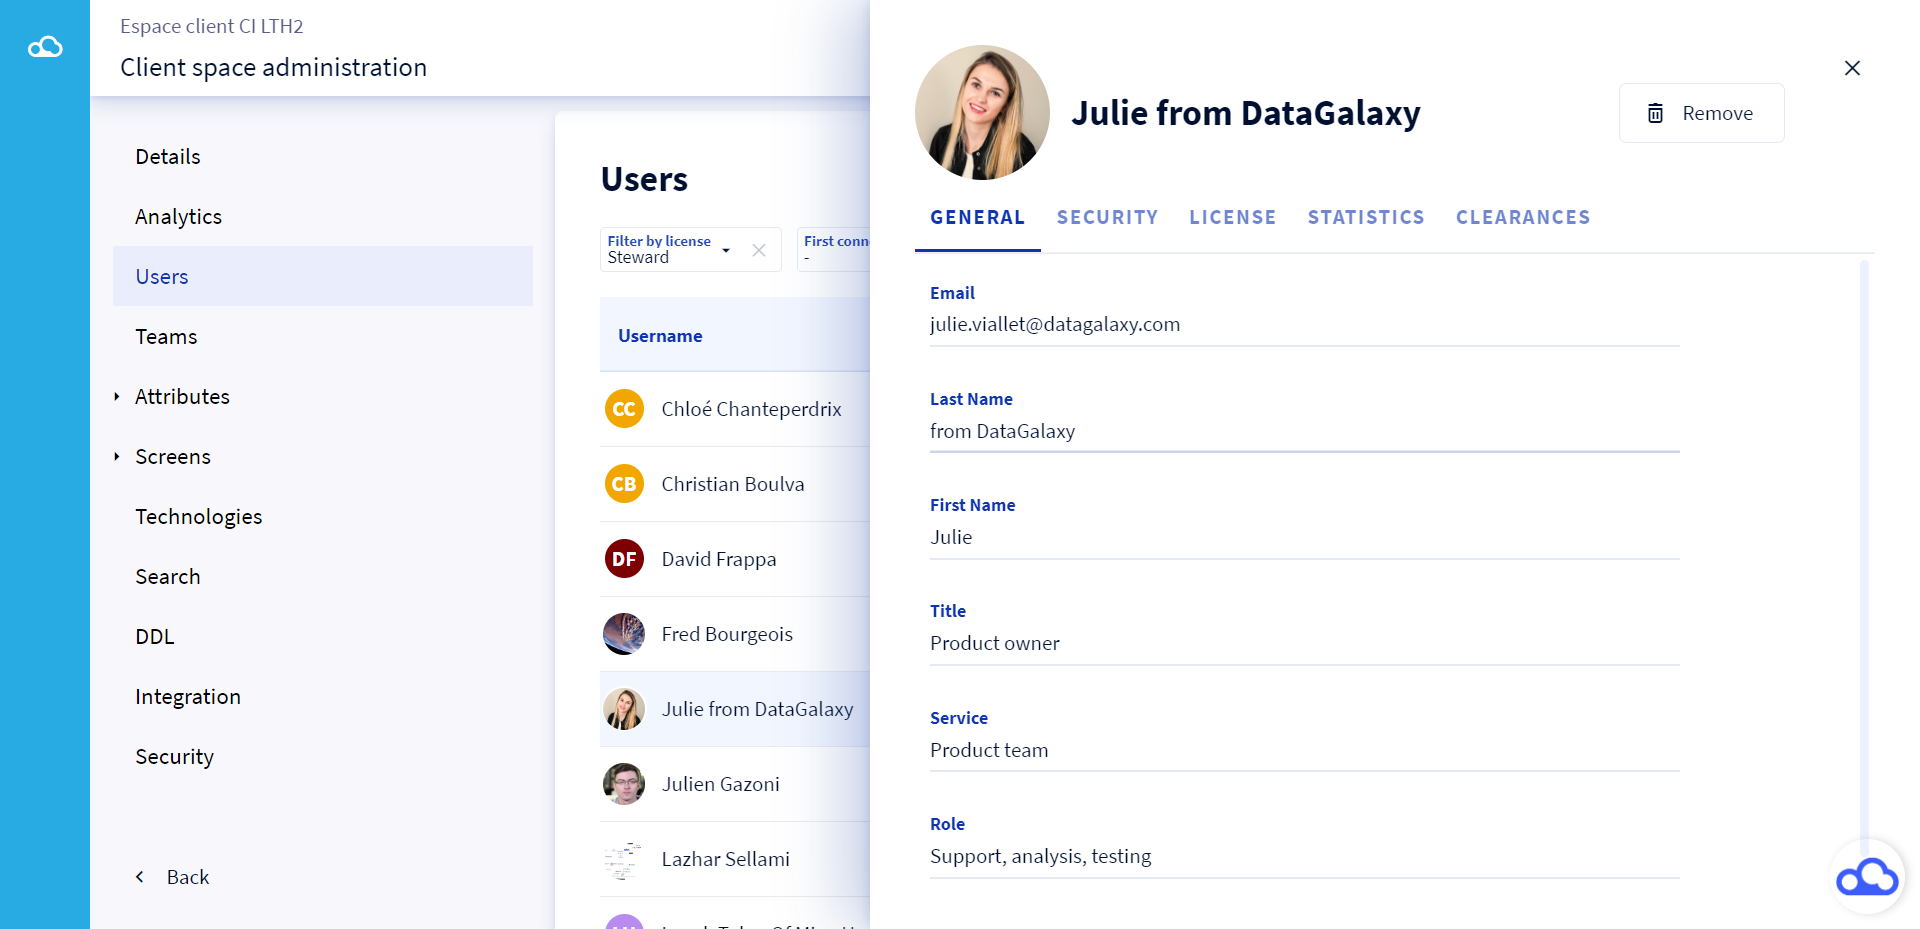
- To check a user's information, click on his or her name from the table. A preview opens on the right side of the screen.
How to manage users in the clientspace?
1 - Create a new user
To create a new user who does not have a DataGalaxy account with his e-mail address, you must:
- Click on the 3 small dots at the top of the users list
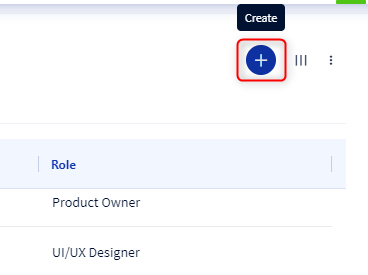
- A window opens, fill in all the fields and click on Create
NB: It is possible to create a user without assigning a license
2 - Delete users
You have the possibility to permanently delete a user from the platform. This is very useful if a user leaves the company.
NB: This feature is only available for users who have been created in your clientspace. For users who have been invited, it will only be possible to remove them from your clientspace. The user will keep his license and his authorizations on the other clientspaces to which he has access.
Before any deletion, it is imperative to remove the user from all objects for which he is responsible. If you have not done this, an alert modal will warn you of all the workspaces in which this user still appears. 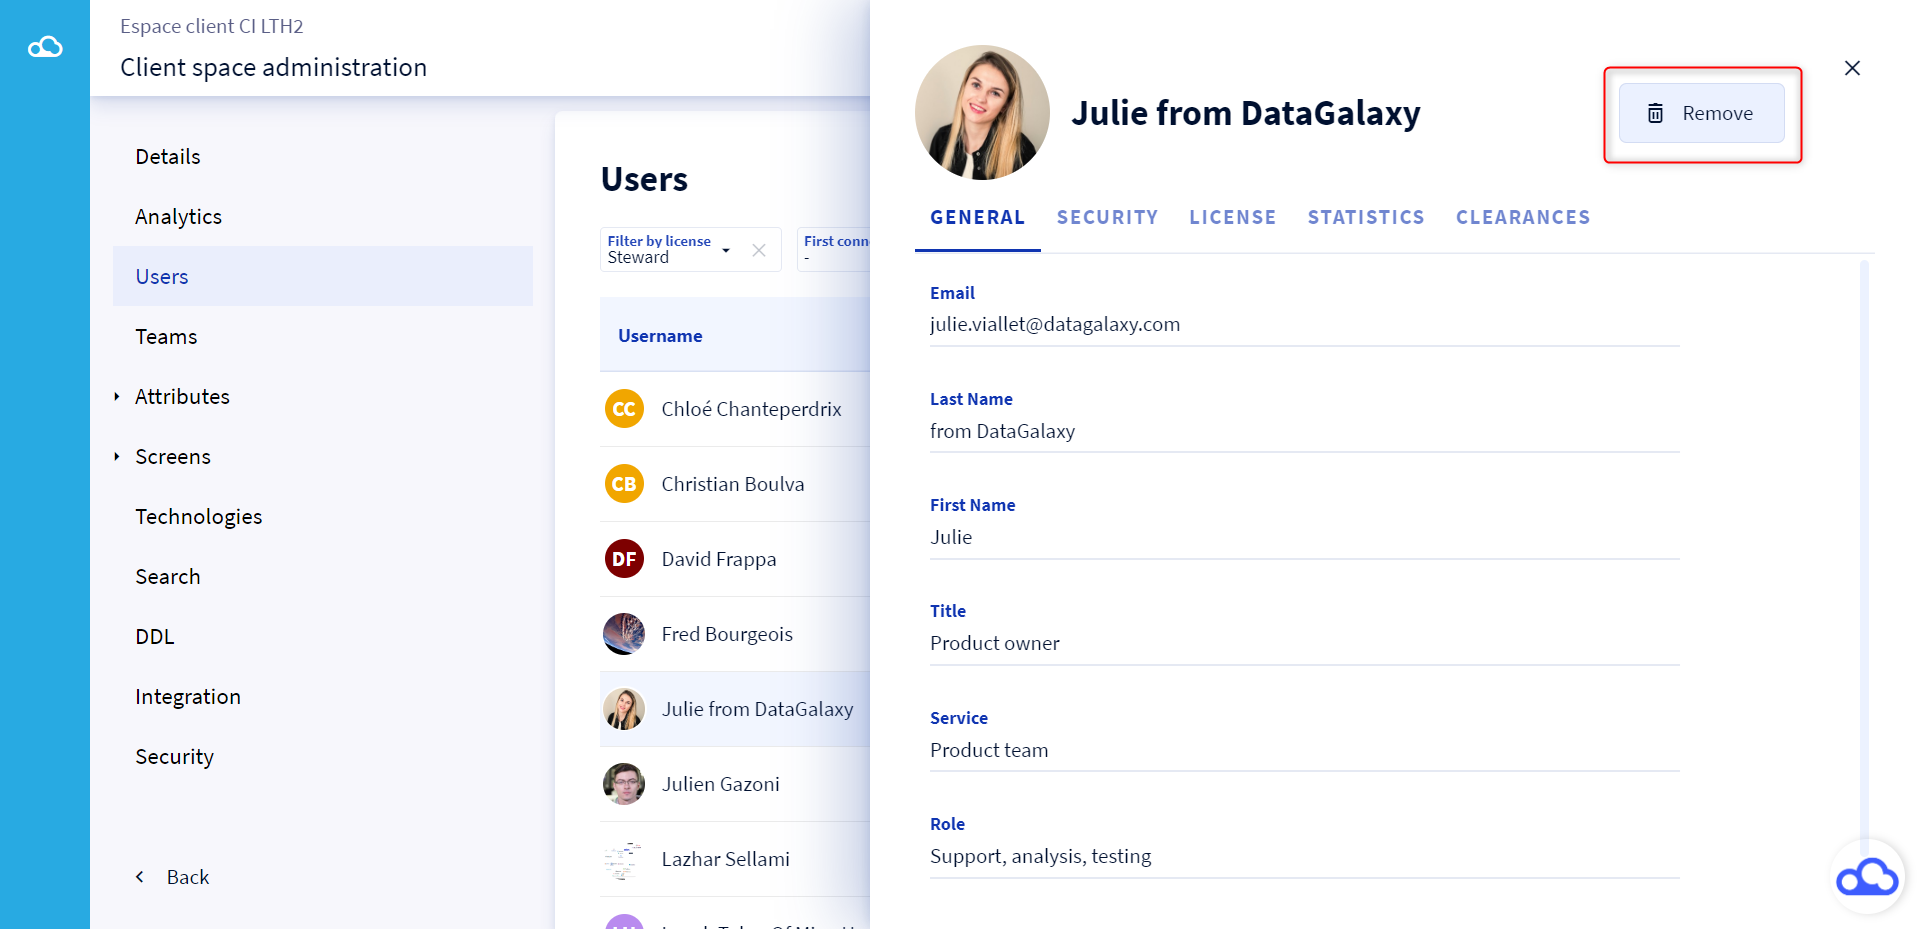
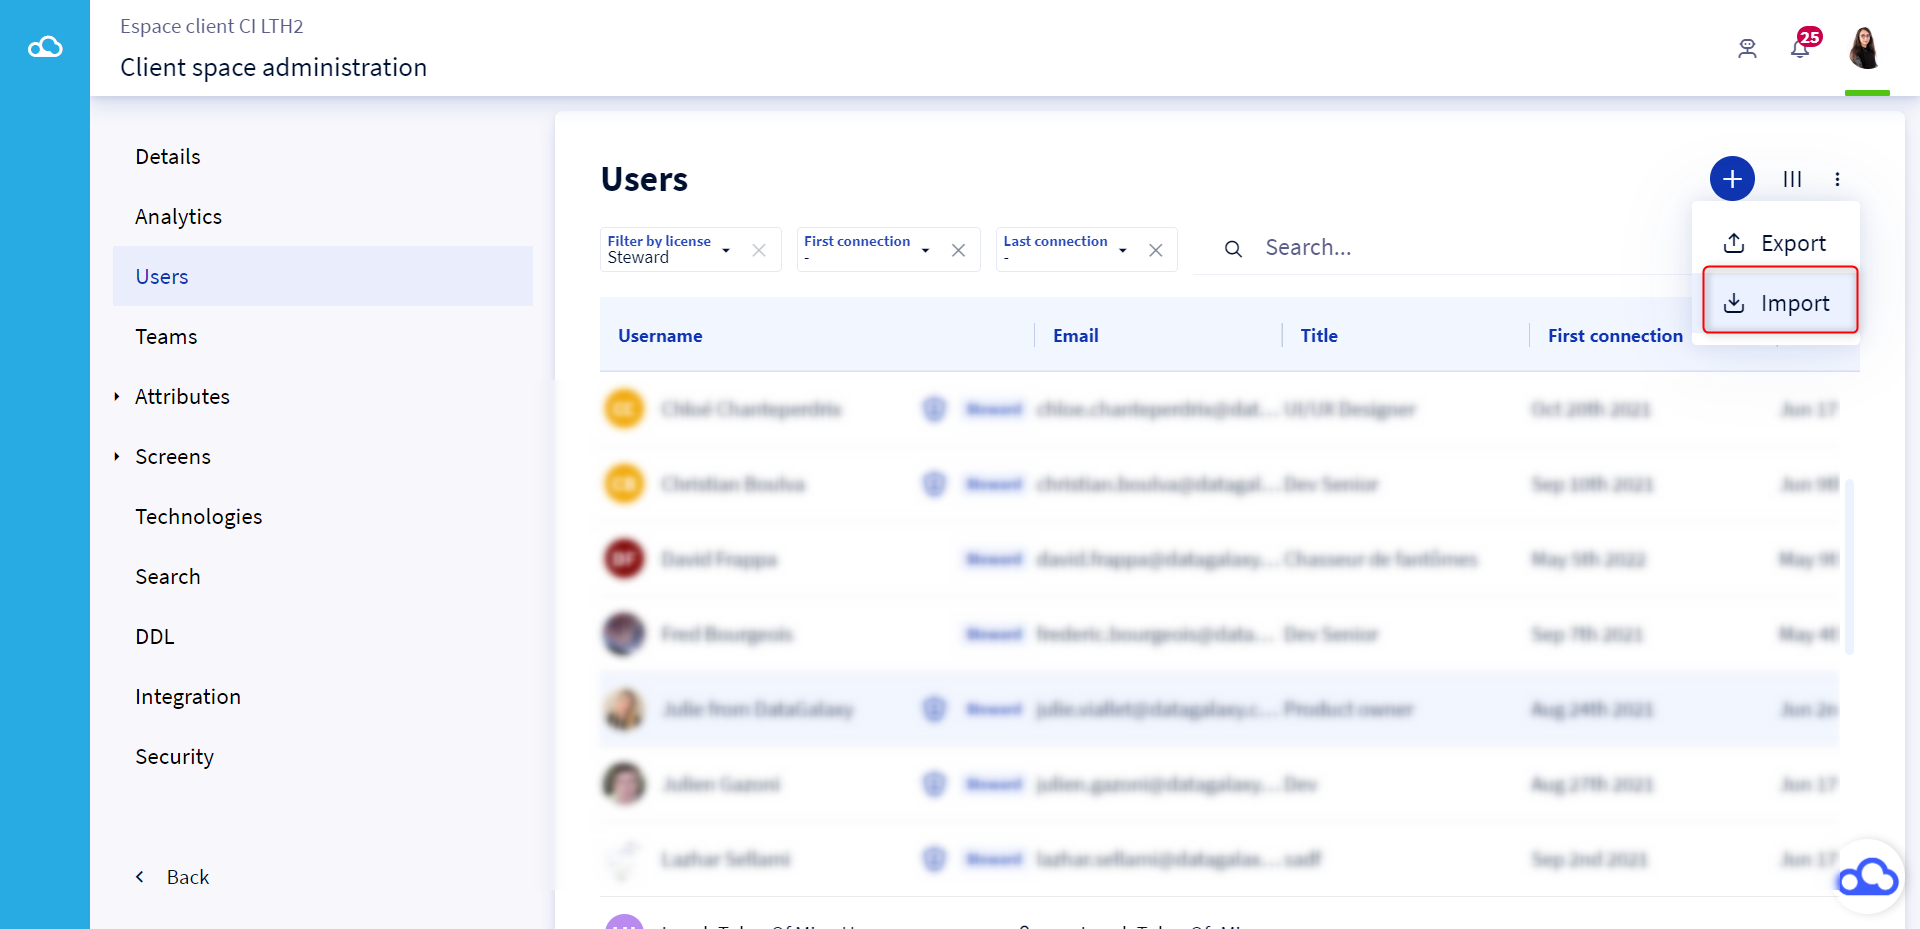
4 - Import users
To obtain the template for importing users, you just need to export this list beforehand (see the following paragraph). Importing users allows you to create or update users.
Updating licenses does not work via the import.
To import users to the clientspace you must:
- Click on the 3 small dots at the top of the user list
- Click on Import in the drop-down list
- A window opens, click on Browse
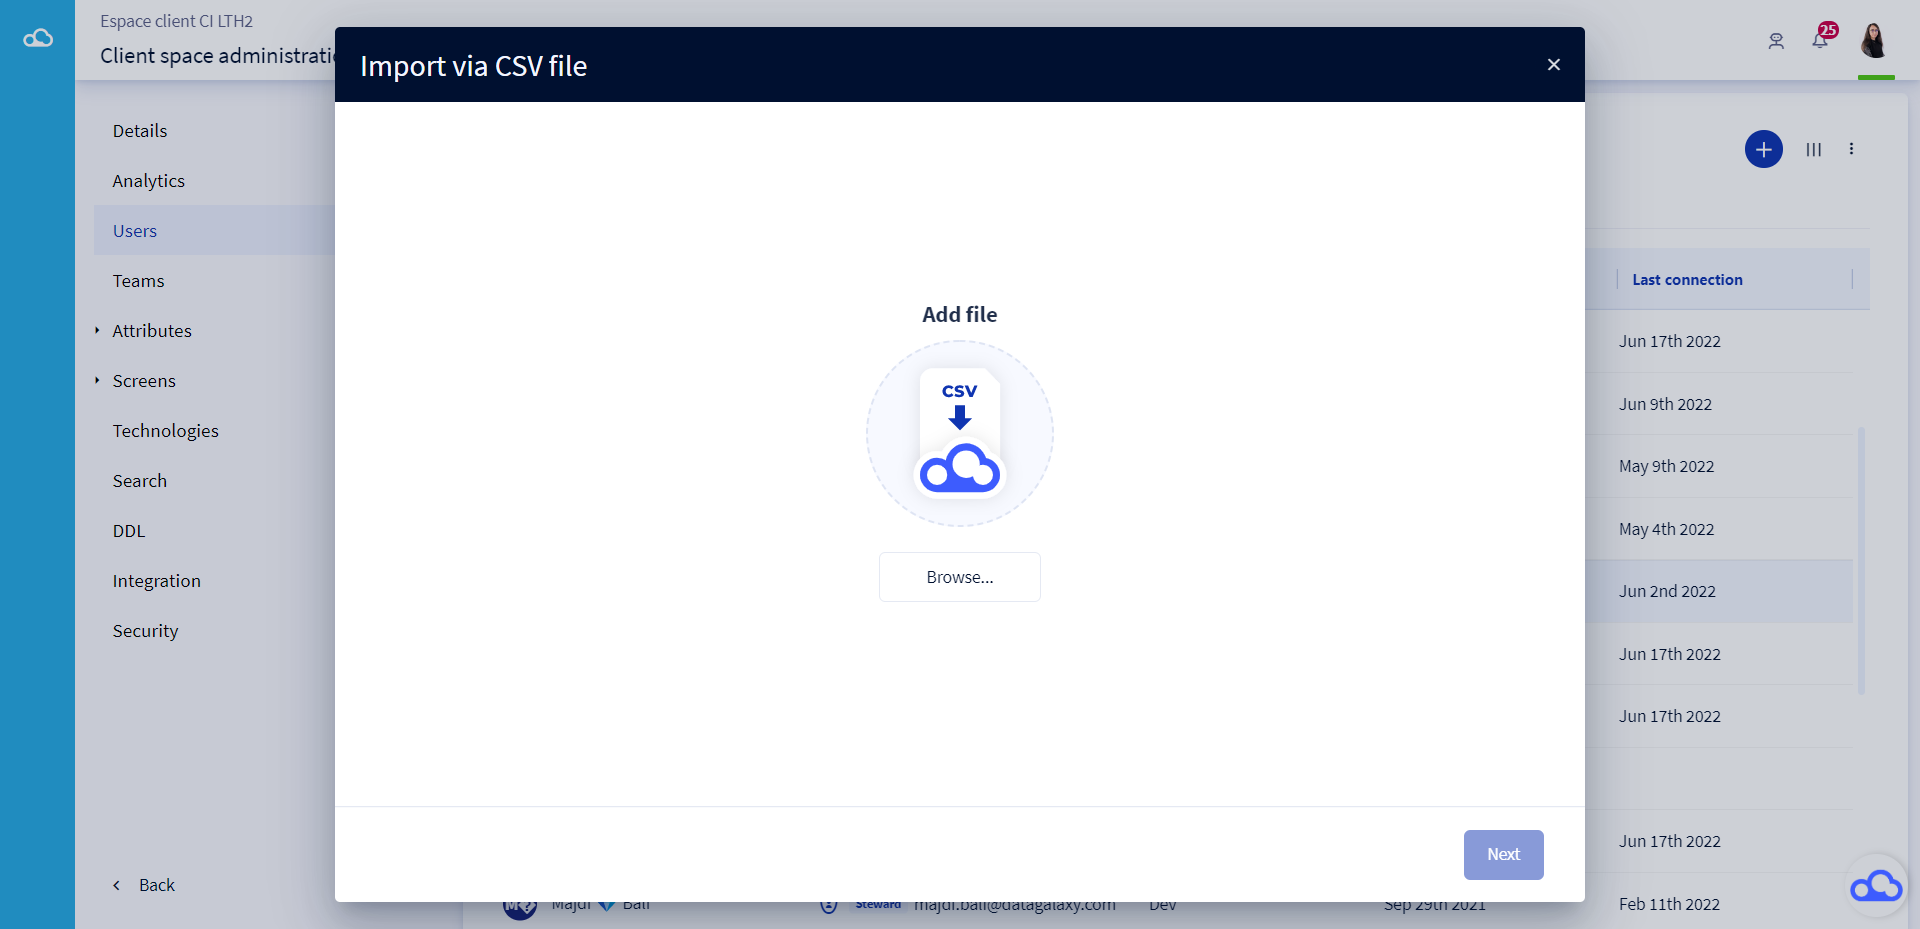
- Download the CSV file containing the list of users and click on the Next button
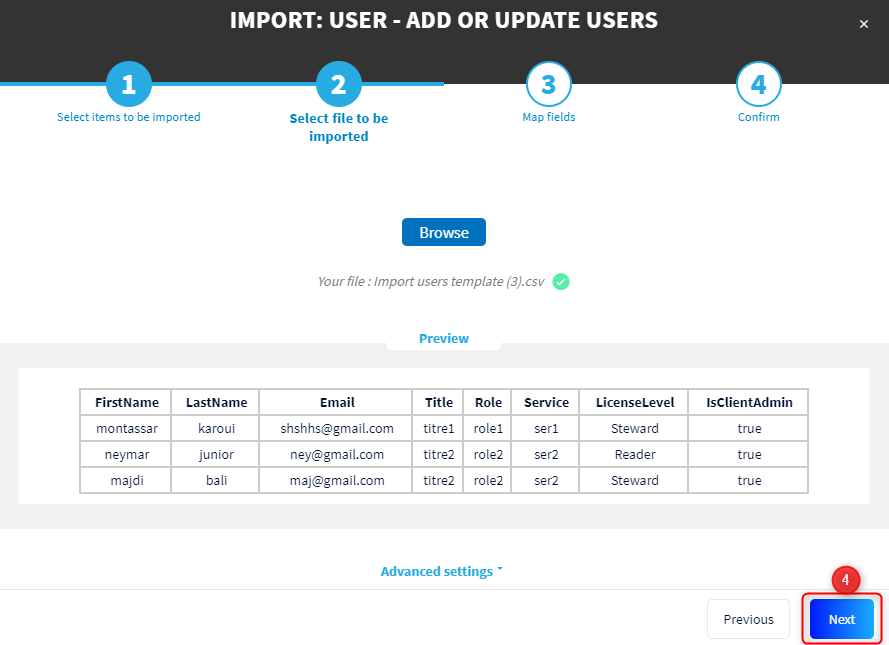
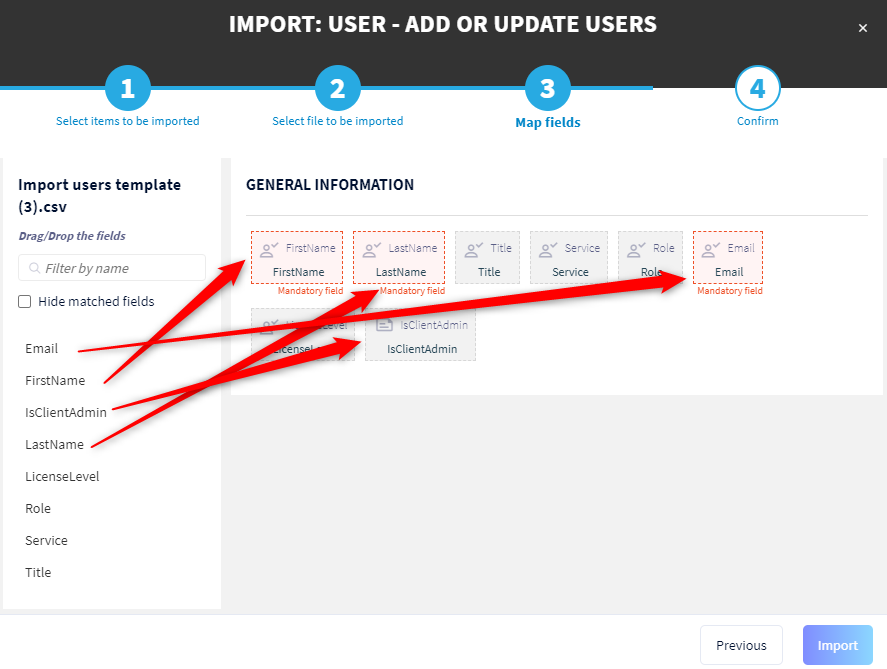
- Do the mapping of the fields you want to import. The mapping is done automatically if the name of the column in the CSV file is identical to the name of the field. Then click on the Import button
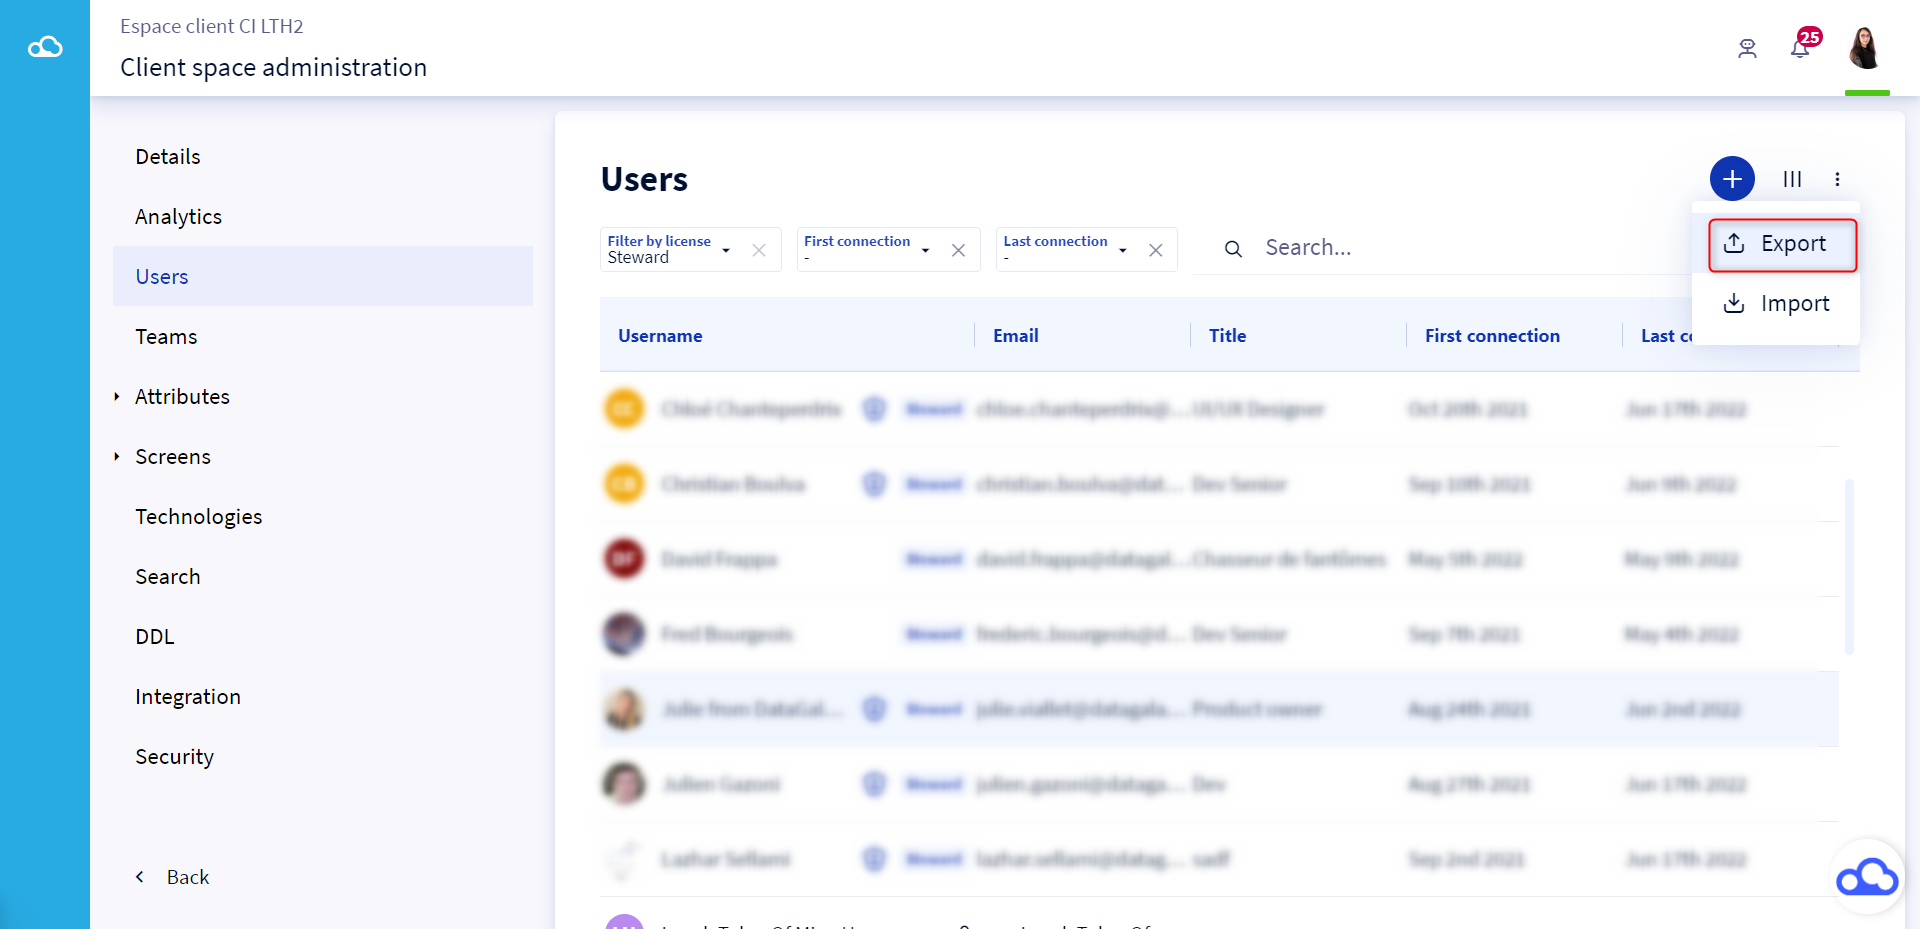
5 - Exporting users
The export of the list of users of the clientspace is done in CSV format with the following fields:
- Name
- First name
- Title
- Service
- Role
- Is an administrator of the clientspace?
- License
- First connection date
- Last connection date
- License start date
- License end date
To export the list of users you need to :
- Click on the 3 small dots at the top of the user list
- Click on Export in the drop-down list
6 - Modify a user's license
This action can only be done via the interface. It is impossible to modify the licenses via the import.
You have the choice between deleting or updating a user licence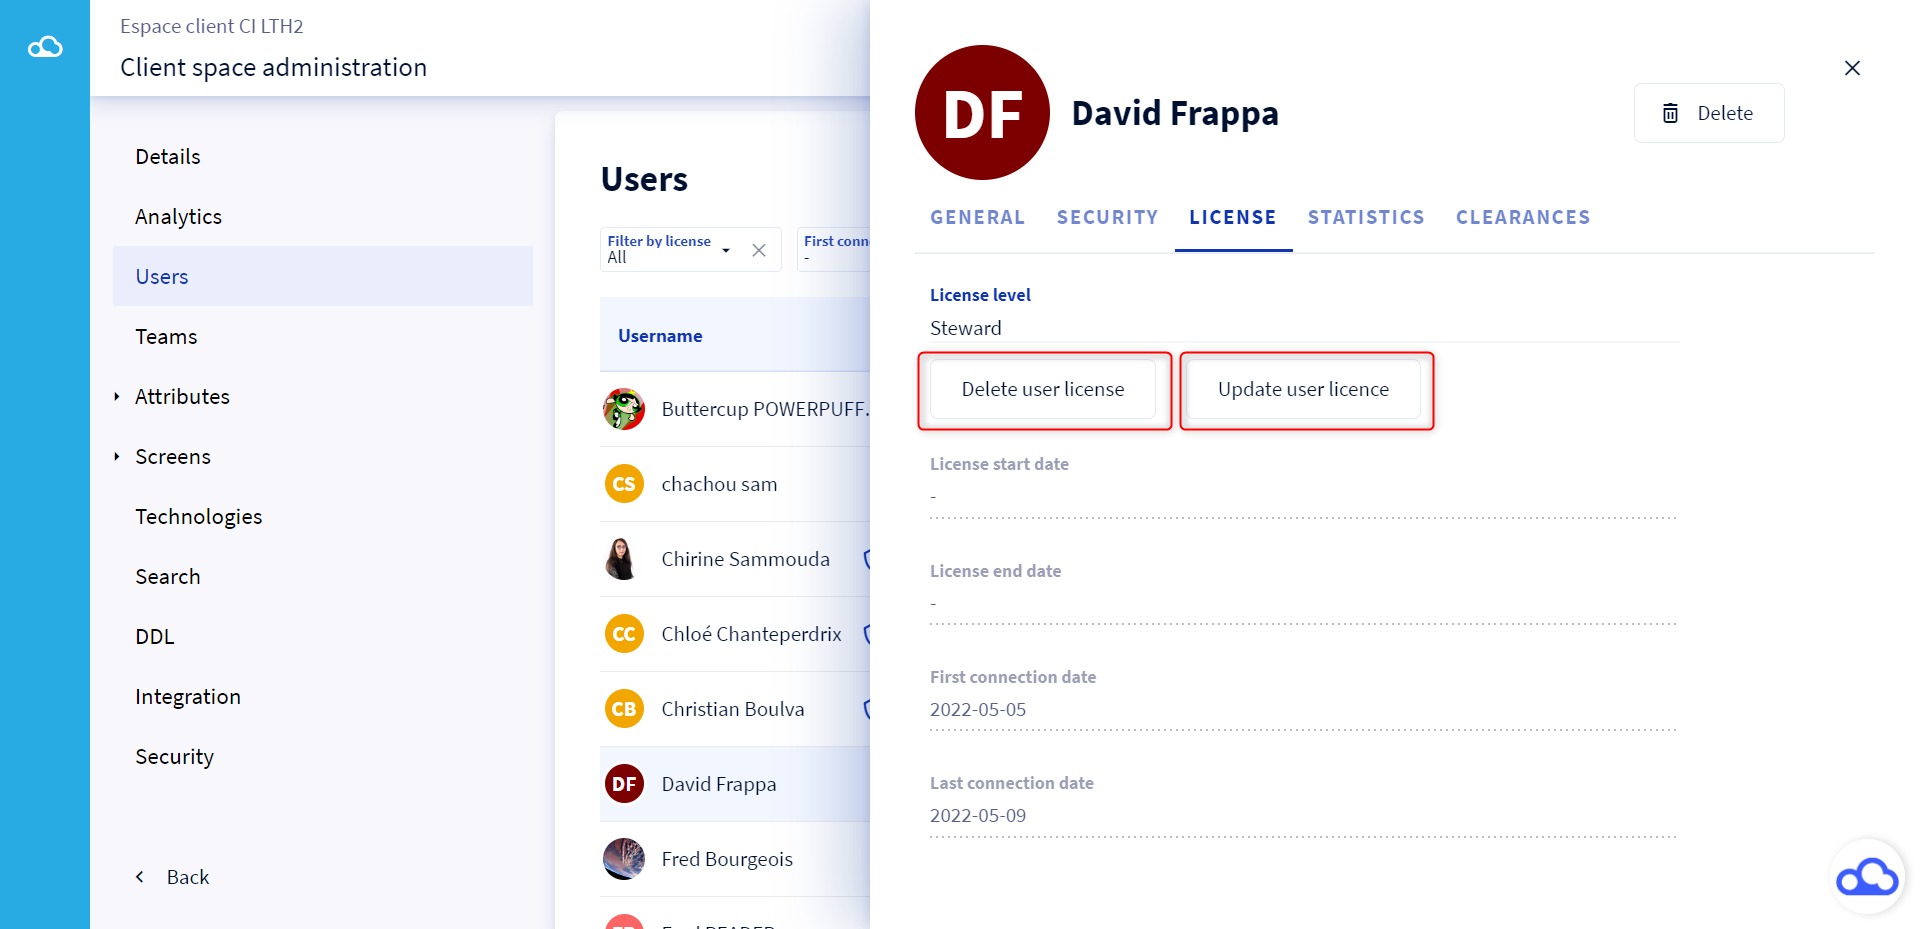
7 - Assign administrator rights
To learn more about the role of the clientspace administrator, please consult this article: [Basics] Manage the clientspace
To assign the administrator rights of the clientspace to a user, you need to check the box Admin access. To remove these rights, simply uncheck this box. 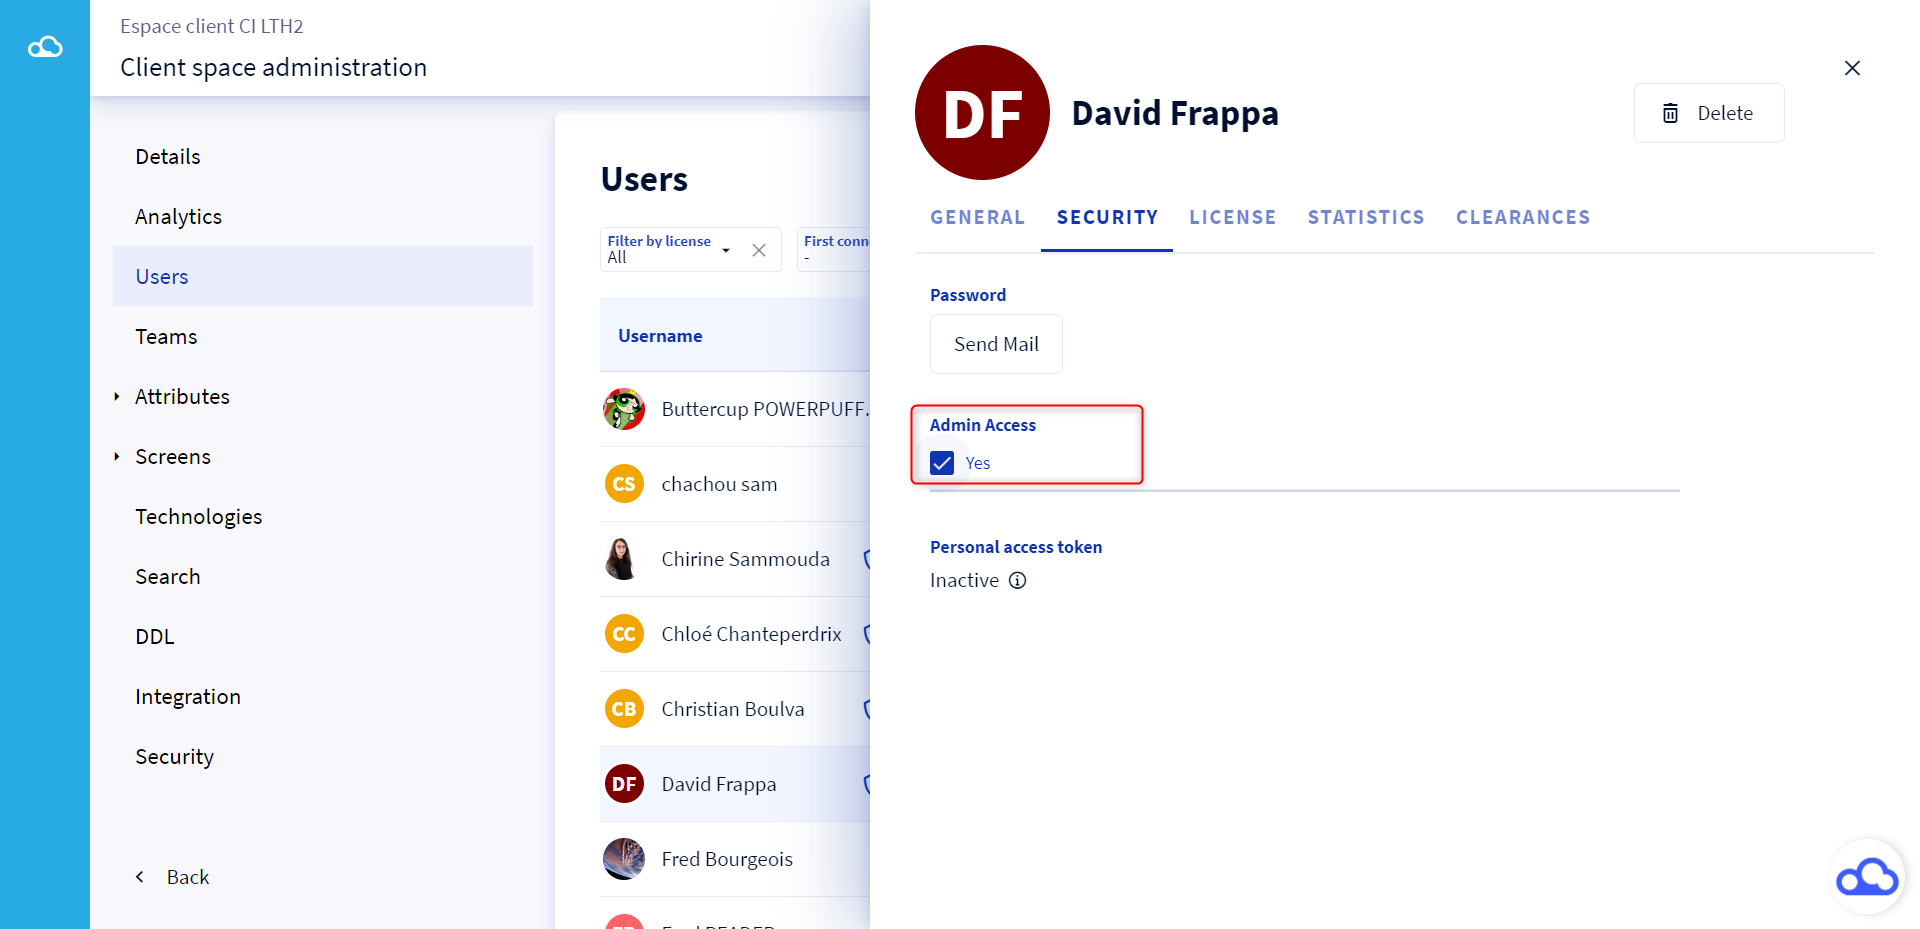
How to view the information on the users of the clientspace?
1 - The last modified objects
You have the possibility to see the last 5 modified objects for each user of the clientspace.
To do so, you just have to access the Statistics tab of a user's profile. 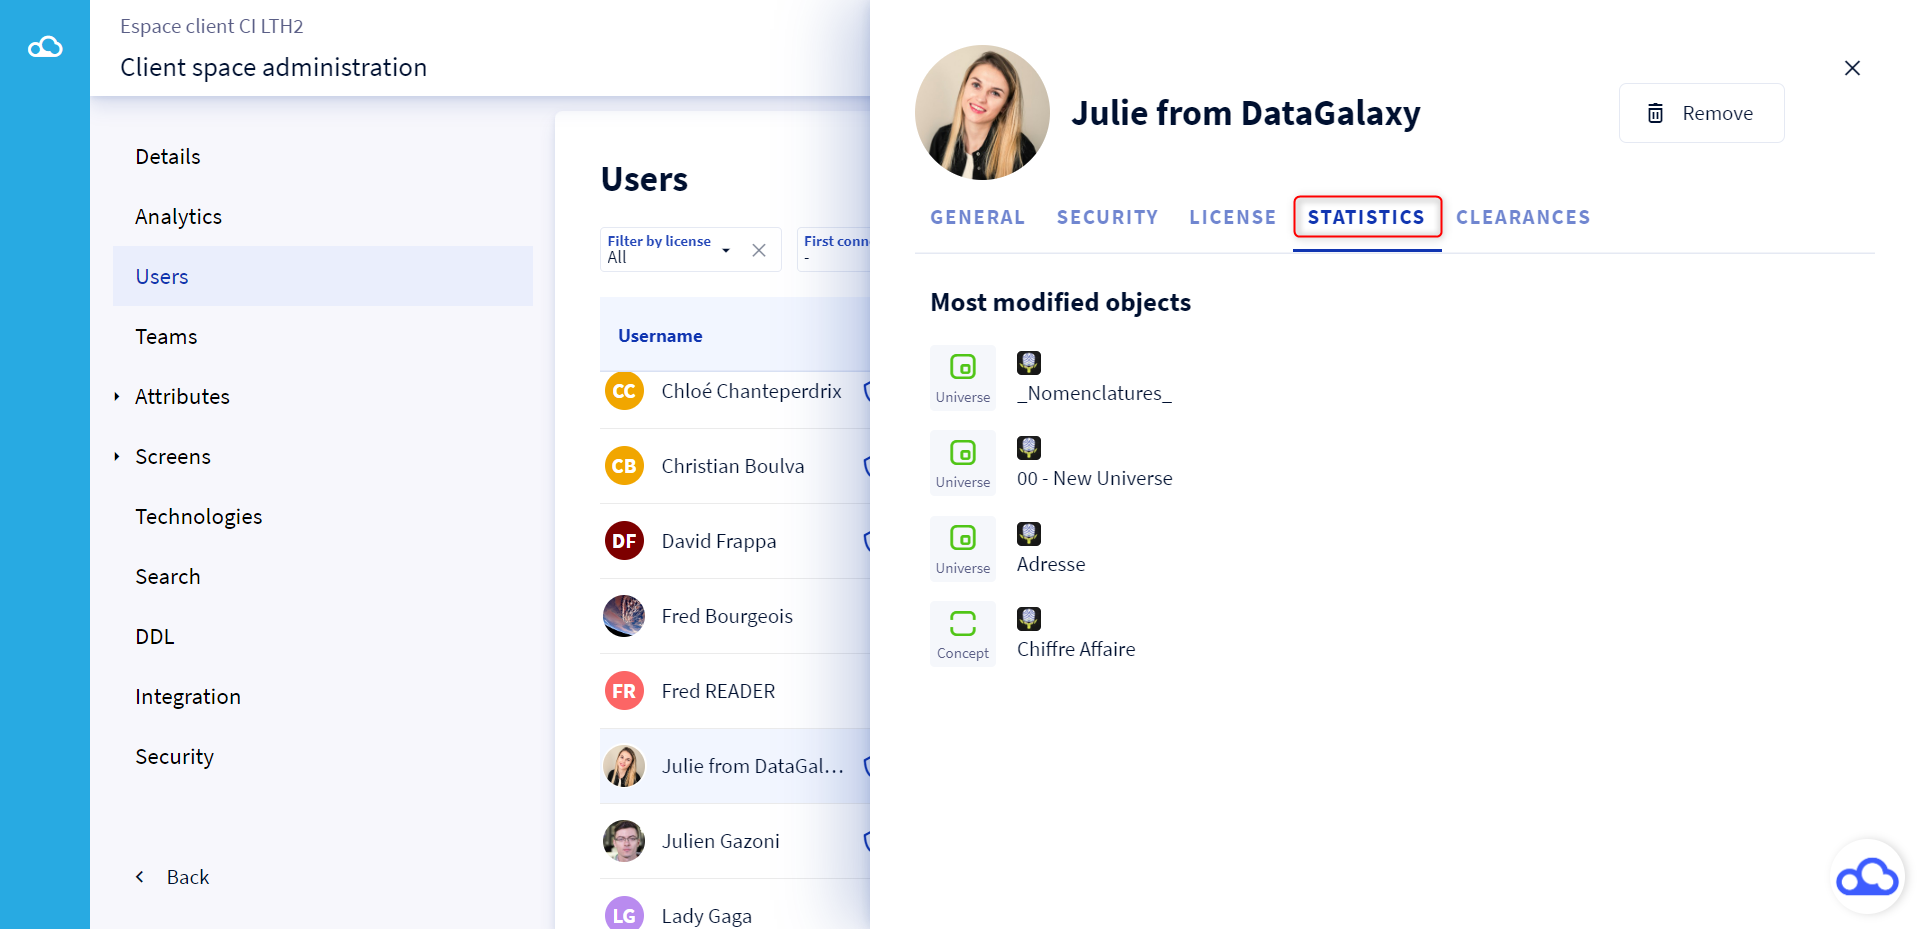
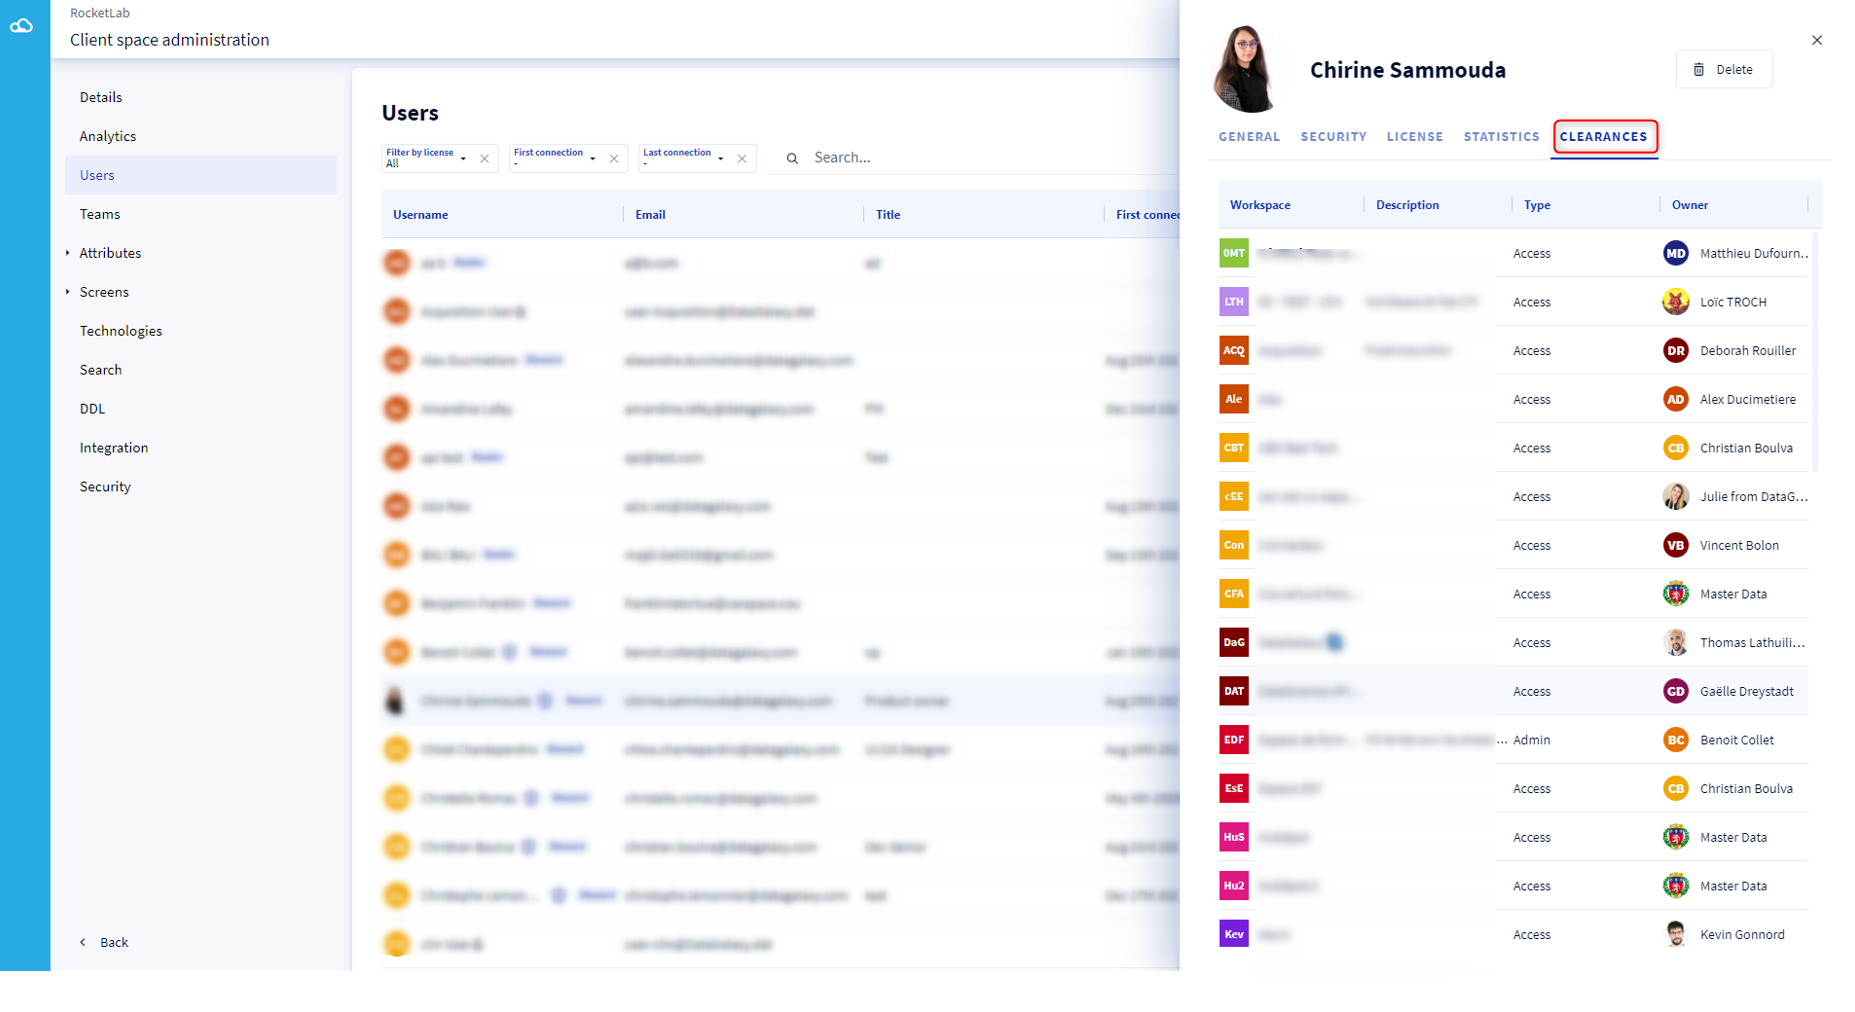
2 - Its workspace access
Keep an eye on the access rights of each user to the workspaces. Go to the Clearances tab to access this information.